How to Winterize an RV: Step-by-Step Guide to Protect Your RV
An RV can sit quietly through winter and still develop an expensive problem. Water trapped in a valve, pump, or appliance line may freeze, while a slowly discharging battery can be damaged before the next trip. Moisture, pests, failed sealant, and neglected tires create additional risks.
Good winterization depends on sequence: drain the water system, protect every plumbing branch, prepare the batteries, and inspect the exterior before the first hard freeze. Keep the RV and appliance manuals nearby because layouts and requirements vary.
What to Know Before Winterizing Your RV
Winterizing is not identical for every travel trailer, fifth wheel, camper van, or motorhome. Bypass valves, antifreeze connections, tankless heaters, and hydronic systems differ. Identify the installed equipment before opening a drain, and let the manufacturer’s instructions take priority over a general checklist.
If you are learning how to winterize an RV camper, use the plumbing diagram and appliance instructions for that specific model rather than assuming every RV follows the same valve sequence.
Why RV Winterization Matters
Water expands as it freezes. PEX tubing can be more tolerant of freezing than some rigid plumbing materials, but it is not freeze-proof. Fittings, filter housings, pump strainers, toilet valves, and appliance connections can still crack when trapped water freezes.
Cold storage also affects batteries, tires, sealants, and the interior. Food residue attracts rodents, and trapped moisture encourages odors or mold. Winterization should address the entire RV, not only its faucets.
Battery preparation is equally model-specific, and knowing how to charge an RV battery safely helps prevent parasitic drain and cold-weather charging damage during storage.
When to Winterize Your RV
Use the forecast at the storage site. A trailer at higher elevation or in an open lot may cool faster than one beside a house. Winterize before temperatures remain at or below 32°F for several hours.
Calendar dates are rough guides. Northern and high-elevation owners may need to prepare in September or October, while milder regions often have more time. The South and Desert Southwest can still receive abrupt freezes. If the RV will be unattended, winterize early rather than depending on a heater or a changing forecast.
Owners who will remain in the rig should follow separate guidance for living in an RV in the winter because occupied plumbing, heating, ventilation, and power needs differ from storage winterization.
How to Winterize and Store an RV for Winter
Read the model-specific procedure and list every water-using feature, including outdoor showers, ice makers, washers, filters, and spray ports. Missing one branch can undo an otherwise careful job.
Step 1: Prepare Winterization Supplies for Your RV
Gather everything before draining the system. Wondering how much does it cost to winterize an RV? DIY costs depend largely on the supplies and tools you already have, while professional service adds labour. Depending on the RV and the method approved by its manufacturer, the work may require:
Non-toxic RV or marine antifreeze labeled for potable-water plumbing. Many RVs use two to four gallons, but larger or more complex systems may need more.
A pump converter, factory pickup tube, or hand pump appropriate for the RV.
A blowout plug and regulated air compressor if compressed-air winterization is approved. If shore power is unavailable, a portable power station can supply a compatible compressor or inspection light within its output limits.
The correct water-heater tools, a potable-water hose, pressure regulator, bucket, towels, and gloves.
Any needed filter bypass, drain-plug washer, anode rod, appliance kit, moisture control, tire covers, or RV cover.
Do not judge antifreeze by color alone. Automotive antifreeze is toxic and must never enter drinking-water plumbing. Confirm that the product is intended for RV potable-water systems and rated for the expected temperature.
Step 2: Clean and Dry the Interior
Empty the pantry and refrigerator, including pet food and anything that can freeze, leak, or attract pests. Vacuum cabinets, remove cooking residue and trash, and store linens in sealed containers or take them home.
Defrost the refrigerator and dry the interior completely. Once power is off, leave the refrigerator and freezer doors secured slightly open so air can circulate. Follow the appliance manual for any drain tray, water filter, or ice maker that also needs attention.
Move cushions away from exterior walls and open interior cabinet doors where airflow helps. Turn off appliances and follow facility rules for propane, fuel, and shore power. Do not leave exterior openings ajar unless the manufacturer and storage conditions permit it.
Step 3: Drain the Water System and Water Heater
Empty the black and gray holding tanks at an approved dump station, then flush them according to the RV manual. Drain the freshwater tank and open the hot- and cold-water low-point drains. Turn off the water pump and disconnect the city-water supply.
Switch off the water heater’s propane and electric modes, let the water cool, and prevent the electric element from being energized accidentally. Relieve pressure as directed before removing the drain plug or anode rod.
Tank-style and tankless heaters drain differently. Do not assume the low-point drains empty the heater. Follow its manual, including instructions for filters or freeze-protection components, and never energize an empty tank-style unit.
Remove or bypass filters as directed. Filter canisters, pump strainers, accumulator tanks, and shower hoses may retain water and need individual attention.
Step 4: Bypass the Water Heater and Protect the Plumbing
Set the water-heater valves to bypass before pumping antifreeze. A three-valve system commonly closes the cold inlet and hot outlet while opening the connecting line, but layouts differ. Follow the manual’s diagram.
There are two common ways to protect the remaining plumbing:
RV antifreeze method: Close the low-point drains and use the pump’s winterizing connection to draw potable-system RV antifreeze. The amount required varies with the RV’s plumbing layout and system size, so check how much antifreeze to winterize an RV before starting. Open the cold and hot sides of each fixture until a solid pink flow appears. Include the toilet, outside shower, spray port, and compatible appliance connections, then switch off the pump.
Compressed-air method: Attach a blowout plug to the city-water inlet and stay below the manufacturer’s pressure limit. Many manuals specify 30 to 50 psi, but that is not universal. Use regulated air in short intervals and open one fixture at a time until only a fine mist remains. Excess pressure can damage the system.
Some manufacturers call for air followed by antifreeze; others approve one method. Air may not clear the pump, strainer, ice maker, washer, or other low sections, so follow each appliance’s directions.
Pour the specified amount of RV antifreeze into each sink and shower drain, the toilet bowl, and the holding tanks to protect traps, seals, and valves. Record the final valve positions for spring.
Step 5: Prepare the RV Batteries for Winter
Turn off 12-volt loads and identify anything still connected. Propane detectors, radios, inverters, and monitoring equipment can remain active even when a battery disconnect is used.
Charge the house batteries as directed. Lead-acid batteries should not sit partly discharged because they become more vulnerable to freezing and sulfation. Check flooded batteries for corrosion and electrolyte level, and charge in a ventilated area.
Many LiFePO4 batteries should not be charged below 32°F unless the battery has manufacturer-approved low-temperature charging protection or heating. Follow the maker’s storage charge, temperature, and inspection requirements.
If removal is permitted, store the battery securely and protect its terminals. Otherwise, disconnect it or use the approved storage mode and charger. Recheck it during long storage.
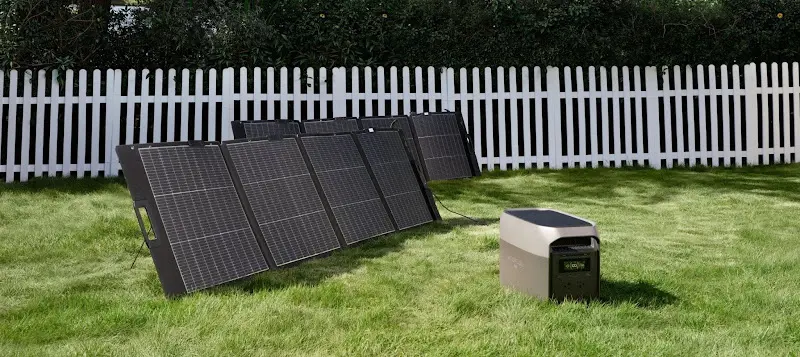
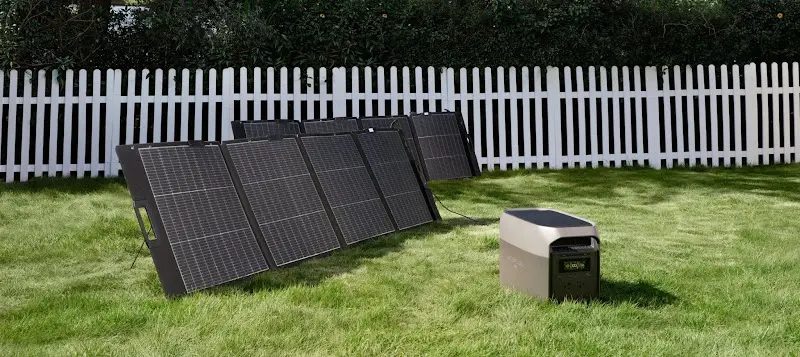
If you plan to use the RV during winter rather than leave it in storage, you may also need a separate power source when shore power is unavailable. Portable power can keep compatible lights, electronics, fans, and selected appliances running without relying solely on the RV’s house battery.
The EcoFlow DELTA 3 Max provides 2,048Wh of capacity and 2,400W of rated AC output for compatible lights, electronics, fans, and selected appliances. Actual runtime depends on the connected load, temperature, conversion losses, and battery condition.
The EcoFlow DELTA Pro offers 3.6kWh of base capacity and 3,600W AC output. Compatible configurations can expand further. Check voltage, running and startup wattage, and required runtime; a resistance heater can drain a battery quickly.
Step 6: Inspect and Protect the RV Exterior
Clean the exterior so cracks and failed sealant are visible. From a safe access point, inspect vents, skylights, antennas, ladder mounts, trim, and roof seams. Use sealant approved for the roof material; household caulk may not bond correctly.
Retract awnings only after they are clean and dry. Condition slide seals and lubricate locks, steps, hitch parts, and leveling equipment only with approved products.
Set cold tire pressure to the RV or tire maker’s storage specification and inspect for cracks, wear, or damage. Park on firm, well-drained ground. Tire covers limit UV exposure but cannot correct underinflation, overloading, or age. Follow the manual for leveling and parking-brake guidance.
Step 7: Choose a Storage Location and Control Moisture
Indoor storage provides the most protection, but a well-drained covered or outdoor site can also work. Avoid parking beneath weak limbs or concentrated roof runoff.
Use a breathable, properly sized RV cover rather than a loose plastic tarp. Secure it as directed and pad sharp corners to limit rubbing.
Moisture absorbers can help but will not correct a leak. Place them where spills cannot damage the floor and inspect them periodically. If shore power remains connected, confirm the facility permits it and the equipment is rated for unattended use.
What RV Winterization Mistakes Should You Avoid?
A rushed job often fails at a small component. Review these trouble spots before leaving the RV.
Leaving water in lines or low-point drains
The tank may be empty while water remains in a toilet valve, outside shower, pump strainer, filter, ice maker, washer, or tankless heater. Mark off every branch as it is protected.
Using the wrong antifreeze
Use RV or marine antifreeze labeled for potable-water systems. Automotive coolant is toxic. Follow the product label for temperature protection, use, disposal, and spring flushing.
Leaving the water heater on or failing to bypass it
An electric element can fail quickly in an empty tank. Turn off every heat source, cool and depressurize the system, then drain it. Bypassing a tank keeps out antifreeze and avoids waste.
Storing batteries without checking their requirements
Battery chemistry and model-specific requirements differ. Confirm the correct storage charge, charger profile, temperature limits, and inspection interval before leaving the RV unattended.
Forgetting model-specific appliances
Ice makers, washers, dishwashers, macerators, and hydronic systems may require additional steps. Use the appliance manufacturer’s procedure.
How to De-Winterize an RV When the Weather Warms Up
Choose a day when another freeze is unlikely and test the RV before loading for a trip.
Flush and Sanitize the Water System
Close the low-point drains, reconnect pump components, and install filters as directed. Using a potable-water hose and regulator, flush every hot and cold fixture until the water runs clear and no antifreeze odor remains.
Sanitize the system according to the manual. One common procedure uses 1/4 cup of unscented household chlorine bleach mixed into 1 gallon of water for every 15 gallons of tank capacity. Fill the system, draw the solution through the fixtures, let it stand for at least four hours, then drain and flush. Bleach strength and directions vary, so use the specified concentration and contact time. Never mix bleach with other cleaners.
Flush with potable water until the chlorine odor is acceptable. Do not let the pump continue running after the tank is empty unless its manufacturer specifically permits dry operation.
Reconnect the Water Heater and Check for Leaks
Reinstall the correct drain plug or anode rod and return the bypass valves to normal. Fill the heater completely, opening a hot faucet until water flows steadily and air is gone.
Pressurize the system while access panels remain open. Check filters, pump fittings, the toilet, heater connections, and appliance lines. If the pump cycles with every fixture closed, find the cause before proceeding.
Do not turn on the water heater until its tank is full and leak-free. Follow the separate commissioning procedure for a tankless heater.
Inspect RV Systems Before Your New Trips
Reconnect charged batteries with correct polarity. Test smoke, carbon monoxide, and LP-gas alarms. Inspect the tires and set cold pressure to the specified value.
Operate the lights, refrigerator, furnace, pump, slides, awning, and stabilizers. If you see propane-system damage or smell gas, arrange professional service. Also inspect brakes, wheel bearings, breakaway equipment, hitch parts, engine fluids, and the generator as applicable.
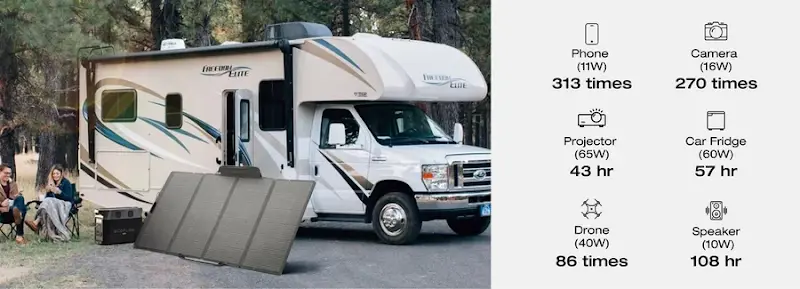
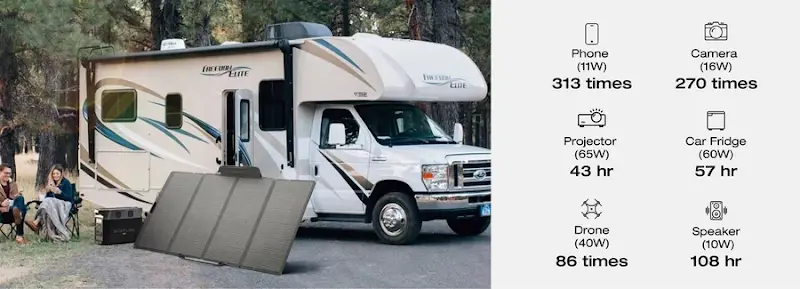
Before the first spring trip, test any solar generator with the compatible loads you plan to use, and confirm that its cables, charging inputs, and storage settings are ready for travel.
Conclusion
Effective winterization covers the less obvious components. Empty the tanks, drain and bypass the heater, protect every plumbing branch, and prepare each battery according to its chemistry. Clean the interior, inspect seals and tires, and limit water and pest access.
Use the manuals for the RV and installed appliances; no general checklist covers every valve, heater, washer, filter, or electrical system. Finishing before the first sustained freeze leaves time to correct a problem while conditions are still manageable.
FAQs
How Often Should You Service Your RV?
There is no single interval for every component. Follow the RV, chassis, axle, appliance, generator, and battery schedules, which may use mileage, operating hours, or time. Inspect the RV before spring travel and winter storage, and arrange annual service when its use or manufacturer calls for it.
Sealant, tires, brakes, wheel bearings, propane equipment, alarms, and batteries may need more frequent attention. Do not postpone a leak, gas odor, brake change, warning light, or electrical fault.
How To Keep Mice Out Of RV During Winter?
Remove food, crumbs, paper, and nesting material. Inspect the underbelly, wheel wells, slides, doors, vents, and utility openings. Seal gaps with durable materials; copper or stainless-steel mesh can be paired with a suitable sealant, while ordinary steel wool may rust.
Keep the surrounding area clear and use snap traps only where they can be checked and kept from children and pets. Scent products do not replace exclusion and cleaning. Avoid loose poison bait inside the RV because of exposure and inaccessible carcasses.
How To Winterize The Water System In Your RV Without Using Antifreeze
If the manufacturer approves air-only winterization, drain the tanks, heater, and low-point lines. Attach a blowout plug, regulate the compressor below the stated limit, and open one hot or cold fixture at a time until only mist appears.
Air may leave water in the pump, strainer, traps, toilet valve, ice maker, washer, or other low sections. Protect them separately. Many manufacturers still require RV antifreeze in drains and the toilet. If the manual calls for antifreeze in the supply lines, air alone is not an equivalent substitute.
How To Winterize RV Water Pipes?
Drain the freshwater system, low-point lines, and heater, then set the heater to bypass. Use the specified method—regulated air, potable-system RV antifreeze, or both—on every hot and cold fixture. Protect the drain traps afterward.
Use the manual’s pressure limit and verify that the pump, strainer, filters, and specialty appliances are protected.
Can You Use An RV Toilet When Winterized?
Using the toilet can compromise the winterization process if the freshwater system is reconnected. If winter use is necessary, follow the RV and toilet manufacturer’s instructions for protecting the freshwater and waste systems in freezing conditions.
Do not assume that RV antifreeze is suitable for every toilet or waste-system component. Keep the black tank emptied and protected as directed, and consider a portable toilet if regular winter use is required.
For press requests or interview opportunities, reach out to our media team
media.na@ecoflow.com