How to Install Plug-In Solar Panels: A Step-by-Step Guide for Beginners in 2026
Transitioning to clean energy no longer means paying steep upfront costs for complex construction work. In 2026, plug-in solar panels are a real option for many people who want to generate their own renewable energy. These can be plugged directly into standard outlets, where they help to lower utility bills immediately.
This guide walks you through plug-in panels, the components, and the step-by-step process to safely install your own solar system.
What Is a Plug-In Solar System, and How Does It Work?
A plug-in solar system, often called a balcony solar system or mini solar kit, is a compact, self-contained unit that lets you generate power from the sun and use it in your home to reduce your bills.
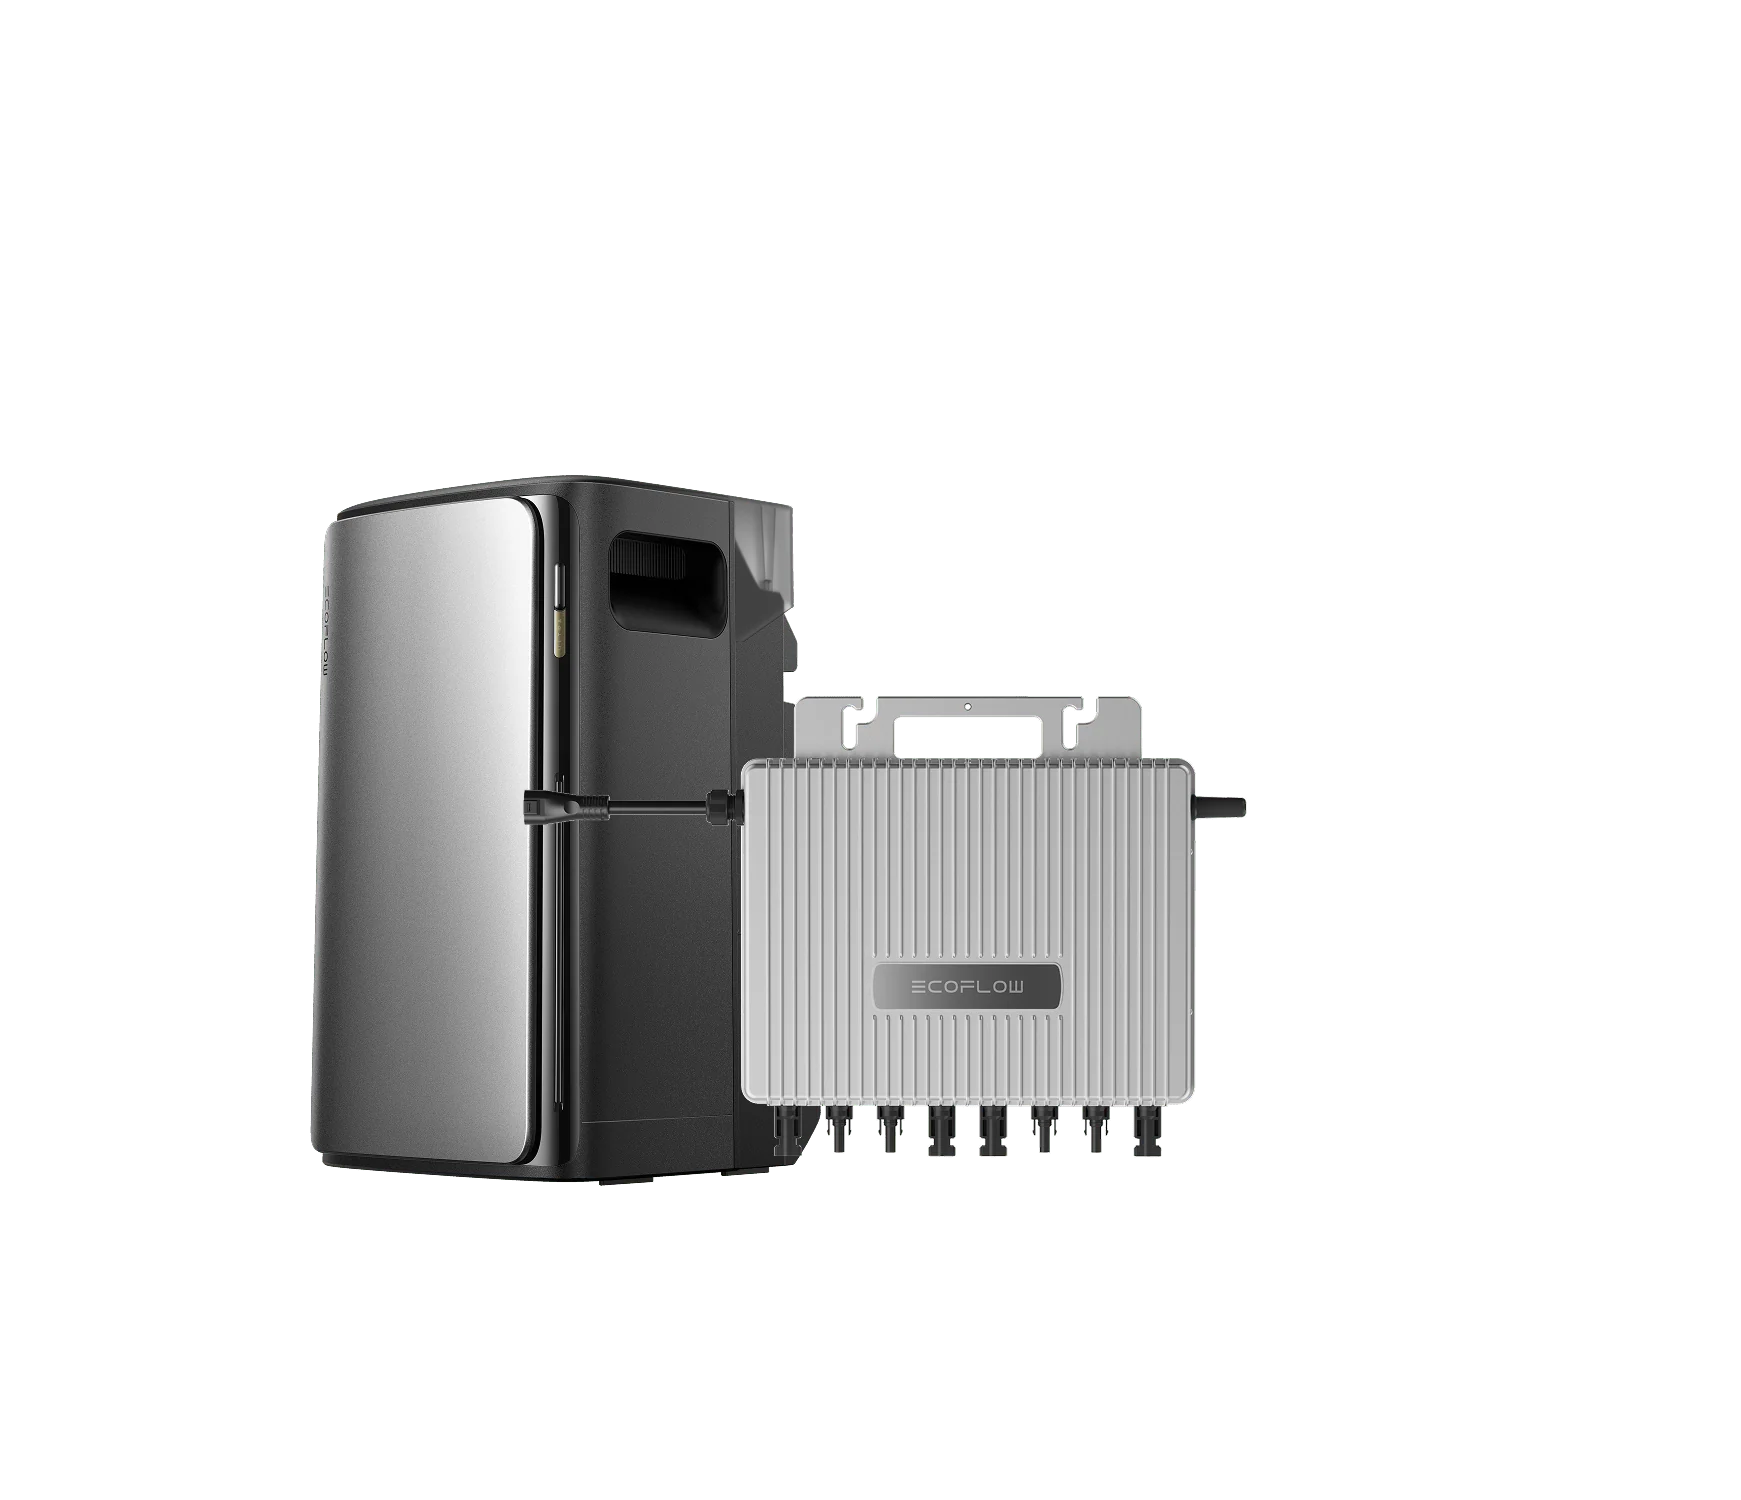
By default, the power feeds directly to your household loads, but if you want to store what you generate rather than consume it immediately, pairing your setup with a unit like the EcoFlow DELTA Pro 3 Solar Generator gives you that battery storage capability.
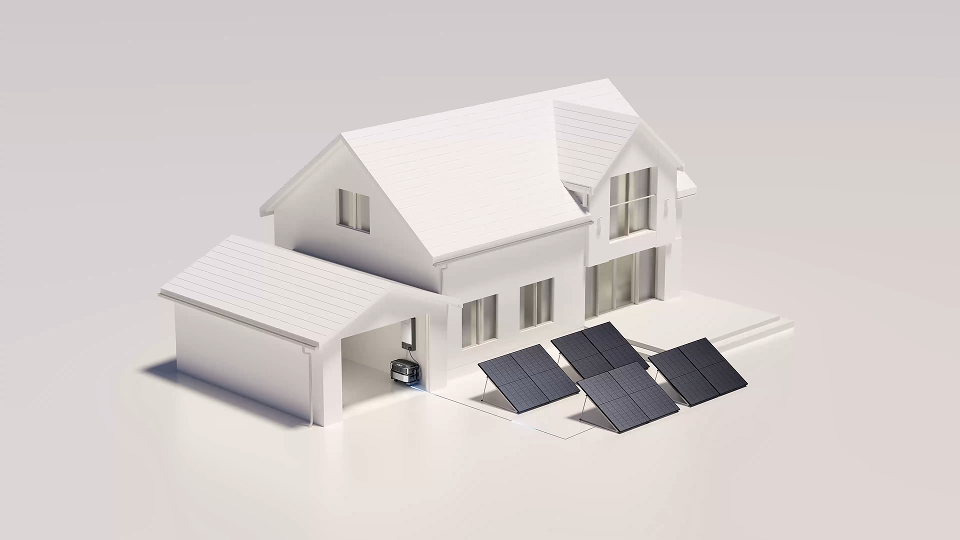
While traditional residential solar installation relies on extensive construction, including roof racking and hardwiring, a plug-in system works like a standard household appliance.
It consists of solar modules paired with a grid-tied microinverter, such as the EcoFlow STREAM or EcoFlow STREAM Ultra. Sunlight hits the panels and generates Direct Current (DC) electricity, which then flows into the microinverter, which transforms the power into clean Alternating Current (AC) electricity.
You can plug it into a standard 120-volt wall outlet and inject solar power directly into your wiring. The power is automatically consumed by household loads, like your refrigerator, before your home draws power from the grid – helping you save on bills.
It should be noted that plug-in solar is not available everywhere in the United States at the moment, but a regulatory shift is underway.
States including Utah, Maryland, Colorado, Virginia, Maine, Connecticut, and Vermont have all signed laws reclassifying small solar kits as consumer appliances that don’t require formal utility permission to use. Permitted systems generally have a power output ceiling of 1,200 watts (1,920 watts in Colorado). Look for components carrying UL 3700 certification, the emerging safety standard for plug-in solar systems in the US.
Dozens of other states are in the process of introducing similar legislation, so always check the local regulations where you are because connecting one of these kits to a standard wall outlet may not be permitted where you live.
What Do You Need Before You Start?
Before you install your plug-in system, you’ll need to gather all the components and ensure your property meets some basic requirements.
Certified Solar Modules – Rigid monocrystalline panels provide maximum efficiency on a ground mount, like your patio, while lightweight and flexible solar panels are for hanging on walls or balcony railings.
Plug-In Microinverter – The heart of the system, this converts DC energy into usable AC electricity.
AC Connection Cable – This heavy-duty cable must be outdoor-rated and compatible with exterior outlets.
No-Drill Mounting Hardware – This can include metal clamps for railings, weather-resistant zip-straps, or weighted ballast mounts for ground setups, depending on where you will install them.
Grounded Outdoor Outlet – Featuring a Ground Fault Circuit Interrupter (GFCI), this protects against electrical faults caused by moisture issues.
How Do You Install Plug-In Solar Panels Step by Step?
Plug-in solar panels are simple to install and no specialized experience is required. Follow these steps to get set up:
Evaluate the site and potential obstructions at midday. Identify any shading that will impact the solar production, like trees and buildings, and position your mounting area where the panels will receive the most exposure.
Mount the panels and secure the solar modules. If you’re setting up on the balcony, you’ll need metal railing clamps or industrial straps. For yards or flat roofs, use an adjustable ballast stand and weigh it down with pavers.
Connect the panels to the microinverter. Do not expose panels to the sun during this step or they could generate voltage and pose a risk. On the back of the panels, you’ll find positive and negative DC cables. Connect them to the input terminals on your plug-in microinverter. Consider a high-quality microinverter such as the EcoFlow STREAM or EcoFlow STREAM Ultra, which are currently only available in Utah and Maryland at the time of writing.
Connect the microinverter to the wall outlet using a heavy-duty AC output cable. Route it from the microinverter to the outdoor GFCI outlet and plug it into the wall socket.
Uncover the panels and position them in the sunlight. The microinverter will take a few minutes to analyze your home’s grid frequency and synchronize with it before starting to generate clean power.
What Are the Most Common Installation Mistakes to Avoid?
While installing a solar kit is a straightforward process for most people, there are some common mistakes that you’ll want to avoid:
Plugging into overloaded circuits – Don’t plug your kit into an outlet that is shared with other high-draw appliances, like pool pumps or space heaters. This can push the circuit past its safe amperage threshold and trip the breaker.
Ignoring minor shading – Even a small patch of shade can cause severe performance drop-offs, so make sure the entire panel surface stays shadow-free.
Buying uncertified kits – Cheap, generic kits lack safety standards, such as rapid shutdown mechanism certification, and they can end up damaging appliances.
Not using proper wind anchoring – Flexible panels are very light, and they can blow away in a gust of wind if not secured properly.
Avoiding these mistakes will help ensure your system operates safely and efficiently.
However, remember that plug-in solar is a supplementary tool to help lower your bills. If your main goal is to get comprehensive backup during a blackout, a dedicated whole-home generator is typically required, like the EcoFlow DELTA Pro Ultra X.
Frequently Asked Questions
Do You Need an Electrician to Install Plug-In Solar Panels?
No, there’s no need for an electrician. Plug-and-play means you don’t need a specialist because certified kits do not connect to your home’s internal wiring, as long as you live in a state where they're permitted. They're classified as consumer electronics provided the system output stays within legislative limits. Most state laws cap certified systems at 1,200 watts, though regulations vary by state. [1]
Can You Install Plug-In Solar Panels in an Apartment?
Yes, you can install plug-in solar panels in an apartment. Because the system uses temporary, no-drill clamps and modular straps, you can mount panels to balcony railings without permanent modifications. That said, always check your lease agreement first, as some landlords or building management companies restrict external fixtures, even temporary ones.
Can You Add More Panels to a Plug-In Solar System Later?
Yes, modern systems are modular, so you can expand your generation capacity by chaining panels together. However, you can't go above the maximum input threshold, which is determined by the microinverter. Before adding panels, check your microinverter's rated wattage to confirm how much additional capacity it can safely handle.
Safer, Smarter, Scalable Solar Installations
Plug-in solar panels are one of the most accessible ways to start generating your own clean energy: no permits, no contractors, no permanent modifications to your home. Follow the steps above, avoid the common mistakes, and you can have a working system up and running in an afternoon.
If your energy needs grow beyond what a plug-in system can handle, the EcoFlow DELTA Pro Ultra X is worth considering. It's a whole-home backup power solution that works with solar input, giving you the flexibility to scale from a starter setup to full home coverage without starting over.
References:
For press requests or interview opportunities, reach out to our media team
media.na@ecoflow.com