Night Photography: Tips, Gear, Camera Settings, and Techniques
Night photography shows a different world with bright city lights and calm starry skies. To capture clear and sharp images in low light, using the right gear, camera settings, and simple techniques is very important. A stable tripod, proper exposure, and controlled ISO help you reduce blur and bring out fine details.
At the same time, reliable power becomes important during long night shoots. Portable power stations ensure your equipment stays powered throughout the shoot without interruption, even in remote locations and harsh conditions, safely.
What is nighttime photography?
Nighttime photography is the art of taking photos after sunset when natural light is very low. It focuses on capturing scenes like city lights, stars, moonlight, and dark landscapes. Photographers use long exposure, slow shutter speed, and careful settings to get clear and bright images in the dark.
In practice, nighttime photography helps capture beautiful night scenes such as glowing streets, star trails, and light trails from moving vehicles. It often requires a tripod to avoid blur and take stable shots. This style of photography shows the beauty of the night world in a creative and detailed way.
What can you photograph at night?
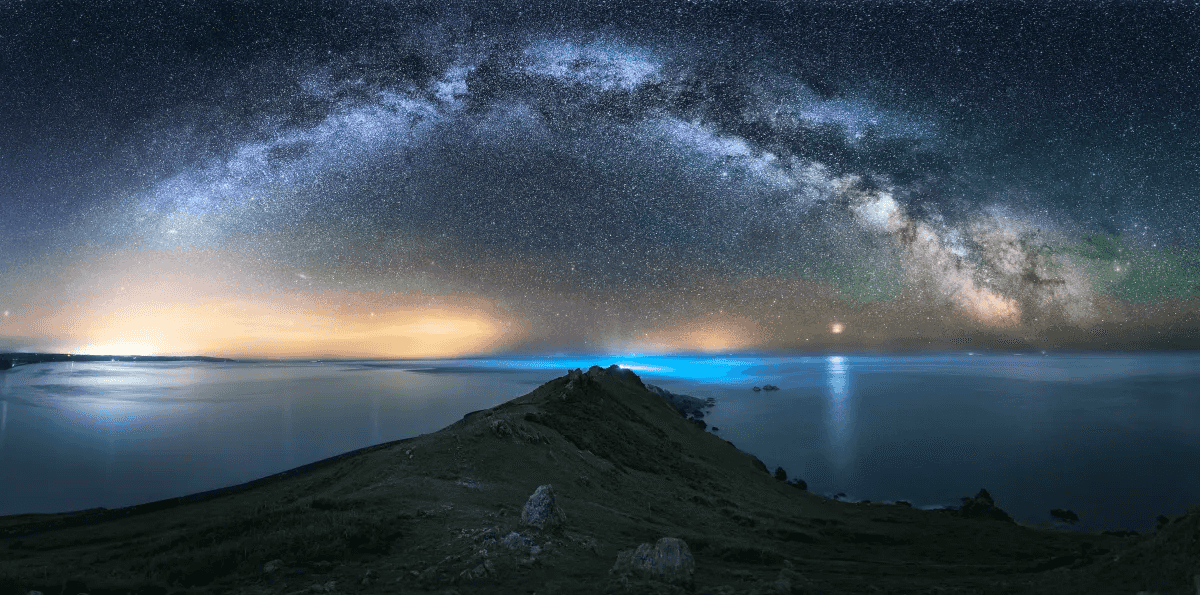
At night, you can capture many beautiful and creative scenes that are not visible during the day. City lights are one of the most popular subjects, showing glowing roads, buildings, and traffic movement. The night sky is also great for photographing stars, the moon, and star trails.
You can also try photography at night in natural places like lakes, mountains, or open fields under moonlight. Light trails from cars and buses create exciting motion effects in your images. In addition, quiet streets and nighttime events offer unique moods that make your photos more interesting and dramatic.
Night Photography Subject | What You Can Capture | Recommended Settings | Practical Tips |
City Lights | Bright buildings, neon signs, glowing streets, reflections on glass | Aperture: f/4–f/8 Shutter: 5–15 sec (tripod) ISO: 100–400 | Shoot from elevated locations like rooftops or bridges for wider city views. |
Light Trails | Moving headlights, taillights, and highway traffic patterns | Aperture: f/8 Shutter: 10–30 sec ISO: 100 | Use a tripod and shoot during busy traffic hours for stronger light trails. |
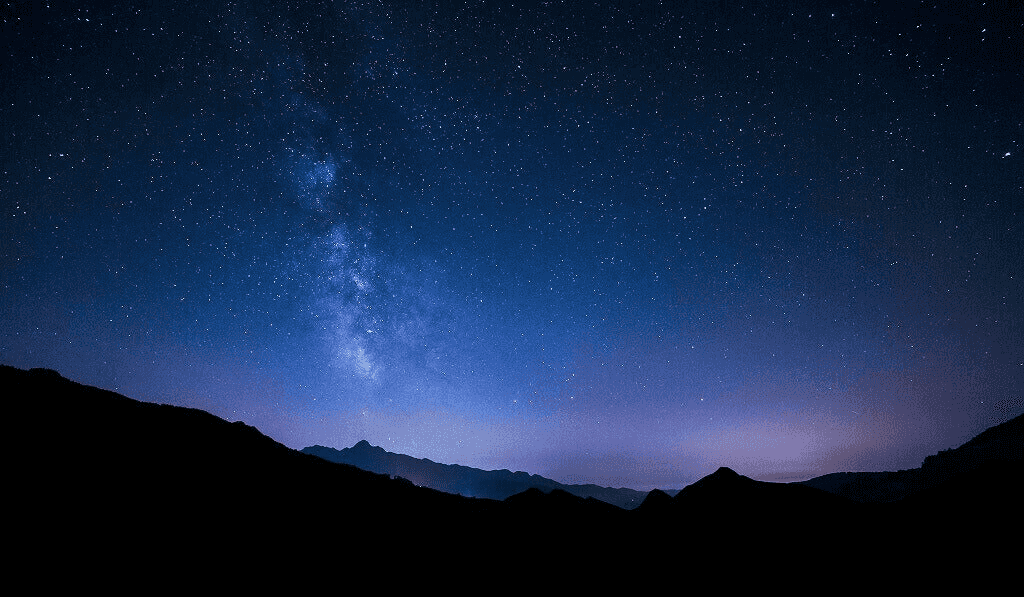
Night Sky (Stars) | Stars, constellations, Milky Way | Aperture: f/2.0–f/2.8 Shutter: 10–25 sec ISO: 1600–3200 | Follow the 500 rule to avoid star trails and shoot in dark locations away from city lights. |
Moon Photography | Full moon details, moonrise scenes | Aperture: f/8–f/11 Shutter: 1/125–1/250 sec ISO: 100–200 | Use a telephoto lens (200mm or longer) for better detail. |
Star Trails | Circular star motion across the sky | Aperture: f/2.8–f/4 Shutter: 30 sec × multiple shots ISO: 800–1600 | Stack multiple long exposures using editing software. |
Lakes and Reflections | Reflections of lights, moon, or skyline on water | Aperture: f/5.6–f/8 Shutter: 10–20 sec ISO: 100–400 | Shoot on calm nights when the water is still for clearer reflections. |
Mountains and Landscapes | Silhouettes under moonlight, illuminated terrain | Aperture: f/2.8–f/5.6 Shutter: 15–25 sec ISO: 800–3200 | Include foreground elements to create depth in landscape compositions. |
Night Street Photography | People, street vendors, illuminated shops | Aperture: f/2.8–f/4 Shutter: 1/60–1/125 sec ISO: 800–3200 | Look for strong light sources like street lamps or storefront lights. |
Night Events | Festivals, concerts, night markets | Aperture: f/2.8 Shutter: 1/80–1/200 sec ISO: 1600–3200 | Use burst mode to capture action moments when changing lighting. |
Clouds at Night | Moving clouds lit by moonlight or city glow | Aperture: f/2.8–f/4 Shutter: 10–20 sec ISO: 800–1600 | Shoot when clouds are moving slowly for dramatic sky textures. |
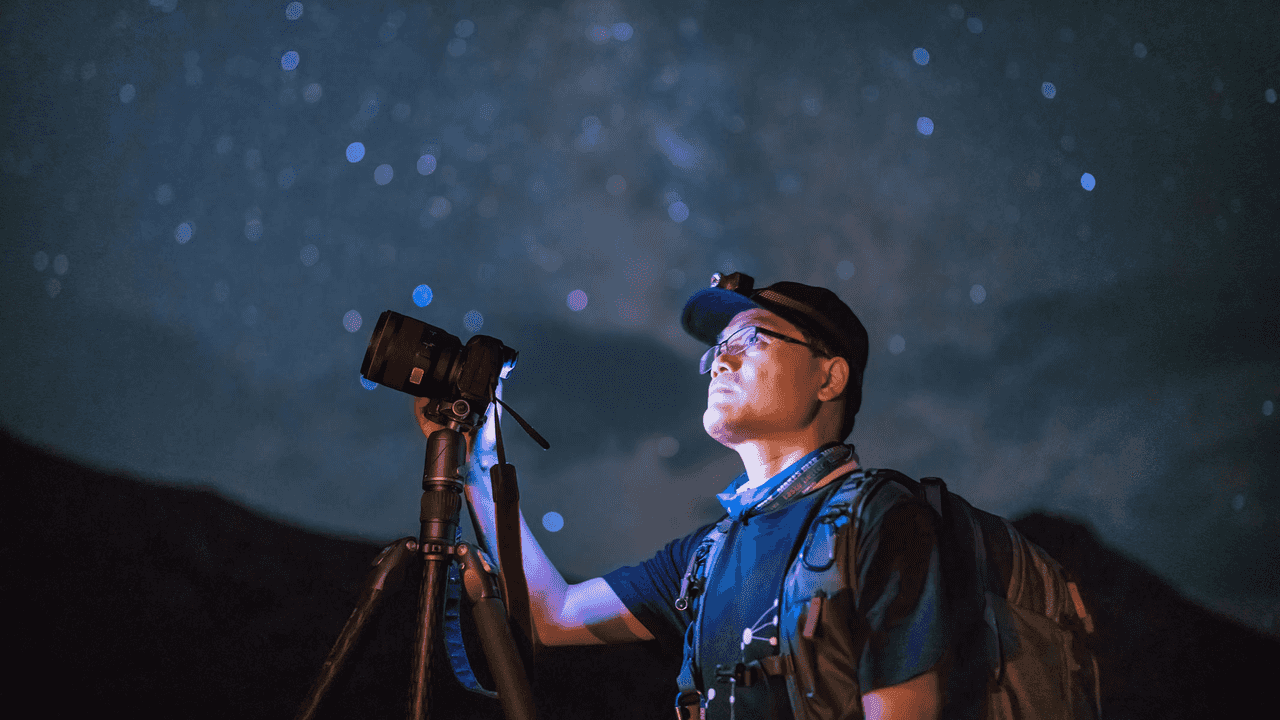
Essential gear for night photography
Night photography requires specific tools to work effectively in very low light conditions. Using the right equipment helps you capture sharper images, control exposure, and reduce unwanted blur. Below are some essential gear items for night sky photography.
Essential Gear | Purpose | Key Features |
Camera body (full frame vs crop sensor) | Helps capture better low-light details and cleaner images | High ISO performance, better dynamic range, and low noise control |
Wide aperture lenses | Allow more light into the camera for brighter night shots | Large aperture (f/1.2–f/2.8), strong low-light performance, shallow depth of field |
Sturdy tripod | Keeps the camera stable during long exposures | Strong build, adjustable height, vibration resistance |
Remote shutter release | Reduces camera shake while taking photos | Wireless/wired control, timer function, shake-free shooting |
Headlamp with red light mode | Helps you see and work in the dark without affecting night vision | Red light mode, adjustable brightness, hands-free use |
Star tracker (for astrophotography) | Moves the camera with the stars for sharper sky images | Motorized tracking, accurate alignment, long-exposure support |
Camera settings for night photography
Camera settings play a very important role in capturing clear and balanced night photos. Since light is limited, adjusting exposure, ISO, and shutter speed becomes necessary for better results. Below are key camera settings that help improve night street photography.
Aperture (f/2.8 to f/5.6)
A wide aperture lets more light enter the camera in dark night conditions. Lower f-numbers like f/2.8 or f/3.5 help produce brighter night images with better fine detail. It also creates a soft background effect that keeps the main subject clear and focused.
Recommended settings:
Night street photography: f/2.8 to f/4
Portraits under street lights: f/2.8 to f/3.5
Cityscape or skyline shots: f/4 to f/5.6
Astrophotography: f/2.0 to f/2.8 (if lens allows)
Using the widest aperture available on your lens is often helpful when shooting handheld at night.
Shutter speed and the 500 rule
Shutter speed decides how long the camera captures light in night photography scenes. Slower shutter speeds allow more light into the camera but may introduce motion blur if not stabilized. A tripod is highly recommended for exposures longer than one second.
The 500 rule helps avoid star trails by limiting exposure time based on the focal length used. It is especially useful for keeping stars sharp in astrophotography night sky images.
500 Rule Formula:
Maximum shutter speed = 500 ÷ focal length
Example values:
14mm lens: about 35 seconds
24mm lens: about 20 seconds
35mm lens: about 14 seconds
50mm lens: about 10 seconds
Recommended shutter speeds:
Night street photography (handheld): 1/60 to 1/125 sec
Light trails (tripod): 5 to 30 seconds
Astrophotography: 10 to 25 seconds
ISO and noise management
ISO controls how sensitive your camera is to light in night photography settings. Higher ISO makes images brighter but can also add unwanted grain or digital noise. Finding the right balance between brightness and noise is essential for clear and clean results.
Recommended ISO ranges:
Night street photography: ISO 800 to 3200
Tripod-based city photography: ISO 100 to 800
Astrophotography: ISO 1600 to 6400
Indoor low-light scenes: ISO 800 to 1600
To reduce noise:
Use the lowest ISO possible for your lighting conditions
Enable long exposure noise reduction if available
Avoid extreme ISO values unless necessary
Manual focus at night
In low-light conditions, autofocus often fails to lock properly on subjects, especially when contrast is low. Manual focus gives you full control to achieve sharp and accurate results.
Practical focusing tips:
Switch to manual focus (MF) mode
Use Live View zoom (5× or 10×) to focus on bright points like stars or street lights
For astrophotography, focus on the brightest star until it appears sharp
For street scenes, pre-focus at a distance of 3–10 meters
Using a tripod helps maintain sharp focus during long exposures.
White balance in Kelvin mode
White balance helps adjust the color tone of night photography images. Kelvin mode allows you to manually control color temperature instead of relying on automatic settings.
Recommended Kelvin values:
Street lights (warm lighting): 3200K to 4000K
City skyline: 3800K to 4500K
Night cloud photography: 4000K to 5000K
Astrophotography: 3500K to 4000K
Mixed lighting scenes: 4000K to 4800K
Adjusting Kelvin manually helps maintain consistent colors across multiple shots.
Shooting in RAW format
RAW format keeps all image data without compression or quality loss. It gives more flexibility when editing exposure, colors, and fine details during post-processing.
Recommended workflow tips:
Always shoot RAW instead of JPEG for night photography
Increase exposure slightly during editing (+0.5 to +1.5 EV)
Adjust white balance and shadows to recover dark details
Use noise reduction tools to clean up high-ISO images
RAW files also allow better recovery of highlights from bright light sources such as street lamps or building lights.
Portable power solutions for night photography
Night photography requires steady and reliable power, especially when shooting in low-light or remote locations. Long exposure shots, lights, and camera equipment all need continuous energy to function properly. With solutions from EcoFlow, night photographers can easily power their essential gear anywhere. Portable power stations provide a stable and portable energy supply for extended shooting sessions.
RIVER 3 Plus Portable Power Station
The EcoFlow RIVER 3 Plus Portable Power Station is a lightweight and reliable portable power solution for night photographers working in outdoor or low-light environments. With a 286Wh base capacity expandable up to 858Wh, it can easily support cameras, LED lights, and small photography accessories during extended night shoots. This makes it a practical choice for portable and on-the-go setups.
One of its key benefits is its compact, travel-friendly design, weighing only 4.7 kg, which makes it easy to carry between shooting locations. It uses LiFePO4 battery technology, providing long-life performance with up to 3000 cycles to 80% capacity, making it suitable for frequent night skyline photography sessions.
For added reliability, it includes a <10 ms UPS function that helps prevent shutdown of sensitive devices like cameras and lighting equipment during sudden power loss. It also operates quietly below 30 dB, ensuring a distraction-free shooting environment during night sessions.
With 600W AC output (1200W surge) and multiple ports like USB-A, USB-C, and car output, it supports several devices at the same time. It also charges quickly, reaching full power in about 60 minutes via AC input, while supporting solar charging for eco-friendly recharging in remote outdoor locations.
Best for: night street photography, outdoor portrait shoots, small LED lighting setups, travel photography, and portable low-light photography projects.
ELTA 3 Plus Portable Power Station
The EcoFlow DELTA 3 Plus Portable Power Station is a high-capacity portable power solution designed for night photographers and outdoor creators who need reliable backup energy. With a 1024Wh capacity, it can power multiple devices, including cameras, drones, LED panels, and charging hubs, during extended night photography sessions. This makes it ideal for demanding outdoor night shoots and remote photography setups.
It delivers strong performance with 1800W continuous output and up to 3600W surge capacity, enabling multiple high-power devices to run smoothly simultaneously. This ensures stable charging for camera batteries, lighting setups, and other essential gear without interruption.
The DELTA 3 Plus also supports fast charging, reaching around 80% in approximately 45 minutes, which is especially useful for quick turnaround between shooting sessions. It also provides solar and car charging options, making it highly flexible for remote night photography locations.
Its multiple output ports—including AC outlets, USB-A, USB-C, and DC connections—enable simultaneous charging of different devices. Through the EcoFlow app, users can monitor battery status and manage power usage easily for better control during shoots.
Best for: night cloud photography, long exposure landscape shoots, astrophotography setups, drone night filming, and multi-device outdoor lighting systems.
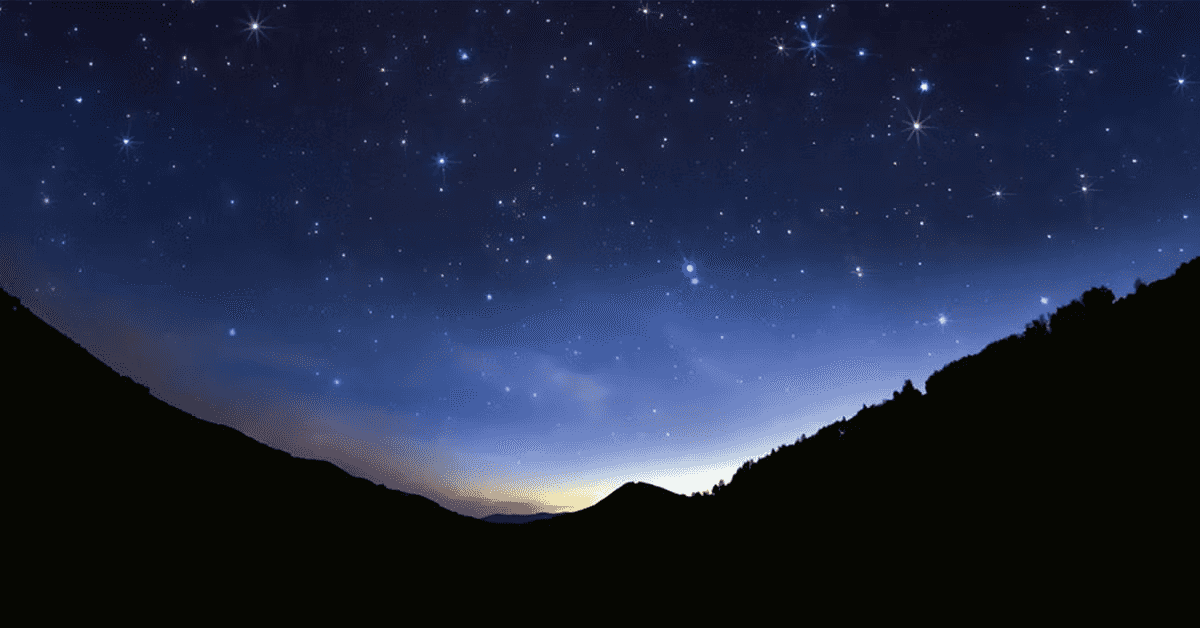
Composition tips for night sky photography
Strong night sky photos begin with simple preparation and clear ideas before you start shooting. Choosing the right location, timing, and composition helps you capture more balanced and attractive images. Here are some easy and practical composition tips for night skyline photography to help you get better results.
Using leading lines and reflections
Leading lines guide the viewer's eyes toward the main subject in your photo naturally and smoothly. Roads, rivers, or paths can naturally direct attention to the night sky scene clearly. Reflections in water also add depth and make the scene more interesting visually.
Framing with foreground elements
Including objects like trees, rocks, or buildings helps frame your night sky image. This adds balance and makes the photo feel more complete. It also gives a sense of scale between the land and the sky above, especially when using the best lenses for night photography.
Keeping the frame simple
A clean and simple composition helps the night sky stand out clearly and beautifully. Avoid adding too many distracting elements in one shot for better focus. Focus on one main subject to keep the image strong and visually clear.
Finding and using available light
Natural and artificial lights can improve your night sky photography in creative ways. Moonlight, streetlights, or distant city glow can add soft illumination to scenes. Using light carefully helps create mood and depth in your image composition.
Conclusion
To summarize, mastering night photography helps you capture beautiful scenes like city lights, starry skies, and dark landscapes with clarity and creativity. Understanding camera settings such as exposure, ISO, and focus ensures every night shot looks sharp and well-balanced. Proper planning, the right gear, and stable support tools help you shoot smoothly in low-light conditions. Portable power solutions like EcoFlow enable you to keep your cameras, lights, and other devices charged even during long night sessions in remote areas. By combining simple techniques, reliable equipment, and creativity, night photography becomes an exciting and rewarding skill. Overall, these tips and tools help you capture stunning and memorable night images anywhere you go.
FAQs
Which is the best camera for nighttime photography?
Full-frame cameras are widely considered the best cameras for nighttime photography due to their strong low-light performance. They capture more light and produce cleaner images with less noise in dark scenes. Brands like Canon, Sony, and Nikon provide excellent options for night shooting with high ISO capability.
What is the 500 rule in night photography?
The 500 rule is a simple method used to avoid star trails in night sky photography. You divide 500 by your lens's focal length to calculate the maximum safe shutter speed. This helps keep stars sharp and clear during long exposure shots smoothly.
Can you do night street photography with a smartphone?
Yes, smartphones today are capable of capturing decent night street photography using built-in night mode. They enhance brightness and reduce noise using advanced software processing. With a steady hand or tripod, you can achieve clear and detailed night street shots.