Outdoor Photography Guide: Gear, Settings & Ideas
- What is outdoor photography
- Key principles of great outdoor photography
- Essential outdoor photography tips
- Planning and preparation for outdoor photography trips
- Portable power solutions for outdoor photographers
- Outdoor portraits: capturing people in natural settings
- Landscape and nature photography: capturing scenic beauty
- How to protect your gear outdoors
- Conclusion
- FAQs
Outdoor photography opens up endless possibilities—from golden-hour landscapes to dynamic wildlife moments. To capture your best shots consistently, having the right gear, optimized camera settings, and fresh creative ideas is essential.
At the same time, reliable power plays a bigger role than many photographers expect. Portable power stations ensure your cameras, drones, and accessories stay charged in remote locations and support longer shooting sessions without interruption.
What is outdoor photography
Outdoor photography is the art of taking pictures in natural or open environments such as parks, streets, mountains, beaches, or gardens. It focuses on capturing real scenes using natural light instead of studio lighting. Photographers use the surroundings, weather, and time of day to create attractive and meaningful images.
In practice, professional outdoor photography enables photographers to capture landscapes, people, wildlife, and everyday life in a natural setting. For example, using sunlight during sunrise or sunset, including natural backgrounds, or capturing movement in nature. This helps create lively, realistic photos that show the beauty of the environment while telling a clear visual story.

Key principles of great outdoor photography
Understanding a few simple principles can help you capture clear, balanced, and more appealing outdoor photos. These basic outdoor photography guides you in using natural light, surroundings, and angles in a better way. Here are some key principles of great outdoors photography:
Understanding and using natural light
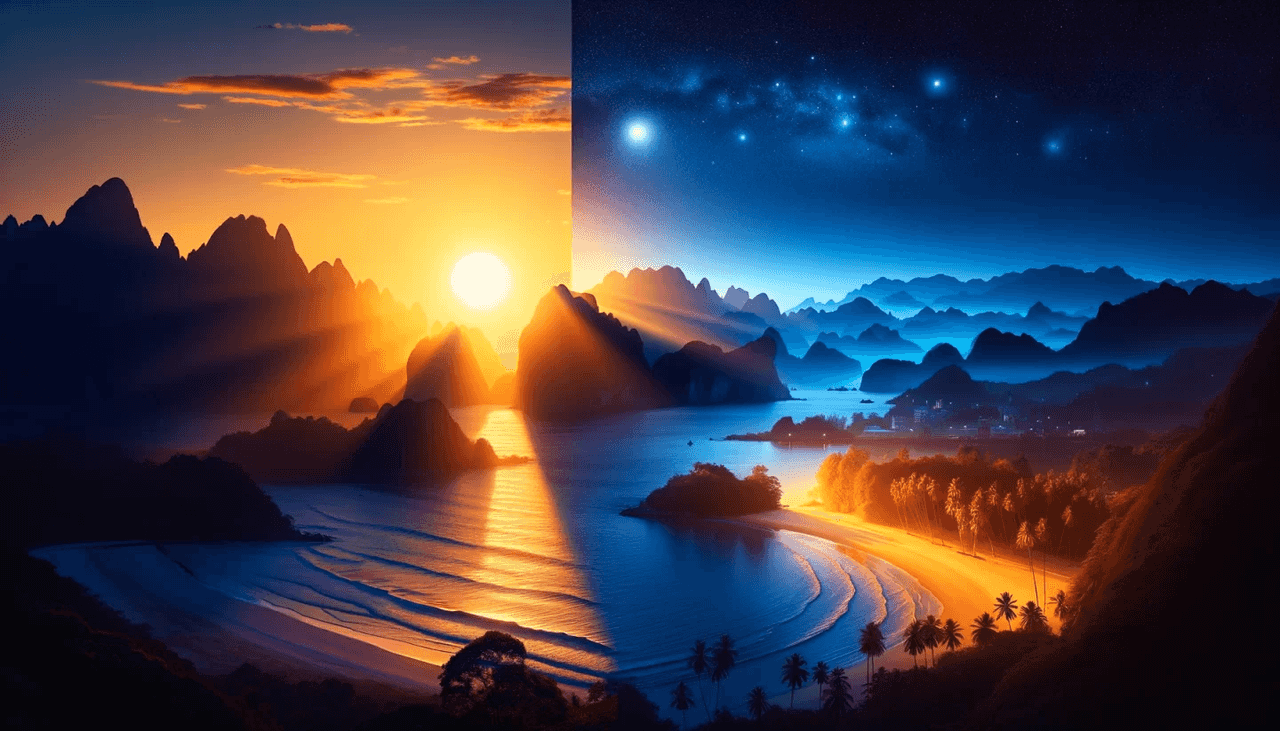
Using natural light in outdoor photography starts with observing how sunlight changes during the day. By noticing its direction and intensity, you can capture brighter, clearer, and more appealing photos naturally. Capturing photos during golden and blue hours adds warm and soft lighting, enhancing colors and mood naturally. Here's how to make the most of these magical times effectively:
Enhancing natural light quality
Golden hour and blue hour provide soft, diffused light that reduces harsh shadows and highlights. During these times, sunlight is warmer or cooler, creating a natural glow that adds depth and dimension to your photos. This helps capture subjects with flattering tones and textures.
Creating mood and atmosphere
These hours naturally enhance the mood of your images. Golden hour adds warmth and a sense of calm, while blue hour produces cool, serene tones that evoke tranquility. Using this lighting strategically can make landscapes, portraits, and cityscapes more visually compelling.
Improving color and contrast
During golden hour and blue hour, the lower angle of the sun creates softer, more directional light that naturally improves both color and contrast. This light brings out richer tones in the sky and surroundings, while adding gentle definition to shadows without making them too harsh.
By paying attention to how light falls on your subject, you can capture more vibrant colors and smoother transitions between light and dark areas. This results in images that feel more dynamic and visually balanced, often requiring little to no heavy editing.
Basic Composition (rule of thirds, leading lines, framing)
Understanding basic composition helps photographers arrange elements in a clear and visually pleasing way. Simple guidelines like the rule of thirds, leading lines, and natural framing can make a photo more balanced and engaging. Here are the basic composition techniques used in outdoor photography.
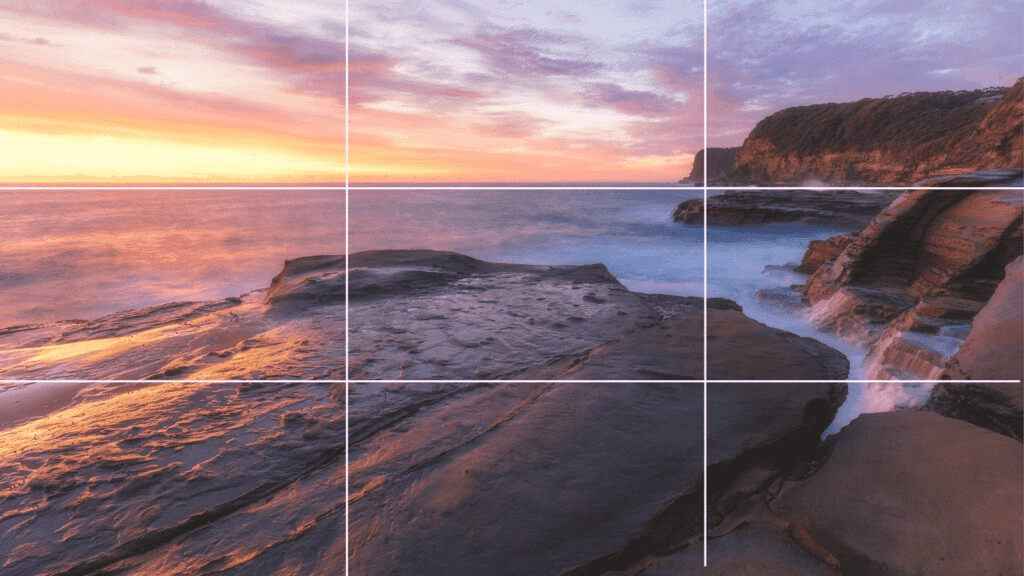
Rule of Thirds
The rule of thirds is a simple way to create balanced and attractive photos. Imagine dividing your frame into nine equal parts using two horizontal and two vertical lines. Important elements are placed along these lines or where they meet to make the image more engaging. For example, in landscapes, the horizon is placed on the top or bottom third, while in portraits, the subject's eyes or body can align with a vertical line.
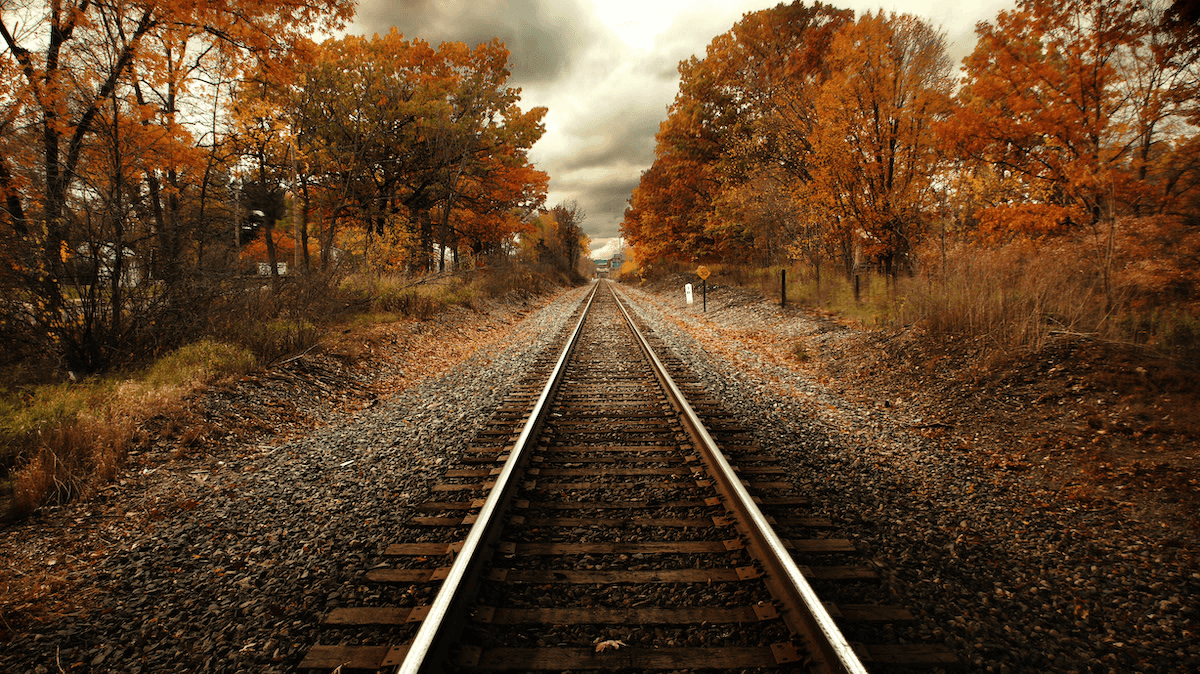
Leading Lines
Leading lines help guide the viewer's eyes through the image toward the main subject. These lines can be natural or man-made, such as roads, rivers, fences, or pathways. When used carefully, they create a sense of direction and depth. This makes the outdoor photography gear feel more dynamic and visually connected.
Framing
Framing uses objects within the scene to surround or highlight the subject. Elements like tree branches, windows, doorways, or arches can act as a natural frame. This method draws attention to the main subject while also adding layers and context to the picture. As a result, the image appears more focused and visually interesting.

Working with backgrounds for clean, impactful shots
A well-chosen background is essential for achieving professional outdoor photography, as it keeps the viewer's attention on the subject and enhances the overall look of the image. Clean and simple backgrounds work best because they reduce distractions and create a clear focus.
To achieve this in real shooting scenarios:
Check the background before shooting by slightly shifting your position to remove unwanted objects like clutter, people, or bright distractions.
Use distance to your advantage—placing more space between the subject and background helps create a softer, less busy look.
Frame your subject with natural elements such as trees, arches, or open sky to guide the viewer's eye.
Watch for color contrast so the subject stands out instead of blending into the background.
These small adjustments make a noticeable difference, helping your subject stand out while keeping the image clean and visually appealing.
Essential outdoor photography tips
Capturing great outdoor photos requires more than just a good camera. It involves understanding light, selecting the right location, and using simple methods to improve image quality. Here are some useful outdoor photography ideas to help you capture better photographs.
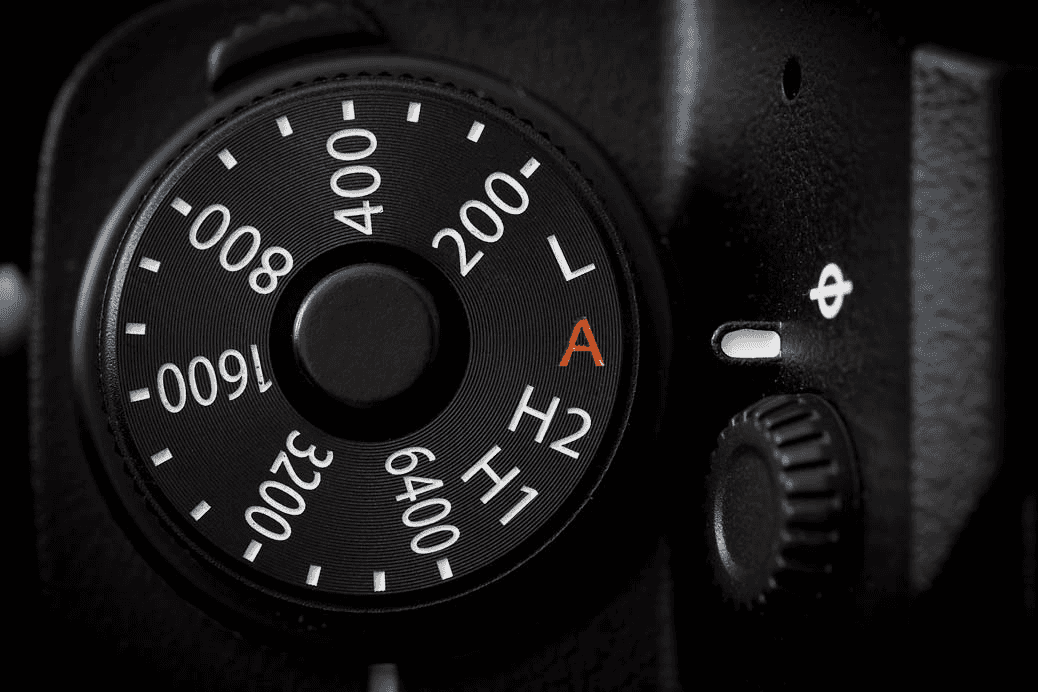
Master your camera settings for outdoor conditions
Outdoor lighting often changes quickly, so understanding your camera settings is very helpful. Adjust aperture, shutter speed, and ISO to control brightness and sharpness. Shooting in manual mode gives you better control over the final image. With practice, you can capture well-balanced photos even in strong sunlight or shade.
Aperture (f-stop)
Landscapes: f/8 – f/16 for sharp depth
Portraits: f/1.8 – f/4 for background blur
Shutter Speed
Fast motion (wildlife, sports): 1/1000s or faster
General handheld: at least 1/125s
ISO
Bright daylight: ISO 100–200
Cloudy/shade: ISO 400–800
White Balance: Use "Daylight" or "Cloudy" to maintain natural tones
Manual mode gives full control, but aperture priority (A/Av) is a great balance for changing light.
Use foreground elements to add depth
Including objects in the foreground can make a photo look more layered and interesting. Items like flowers, rocks, or branches help guide the viewer's eyes toward the main subject. This simple approach adds a sense of distance and space to the image. It makes outdoor scenes feel more natural and engaging.
Add visual layers to your composition:
Place foreground subjects (rocks, flowers) 1–3 meters from the lens
Use a wide-angle lens (16–35mm) to exaggerate depth
Focus using f/11 to keep the foreground and background sharp
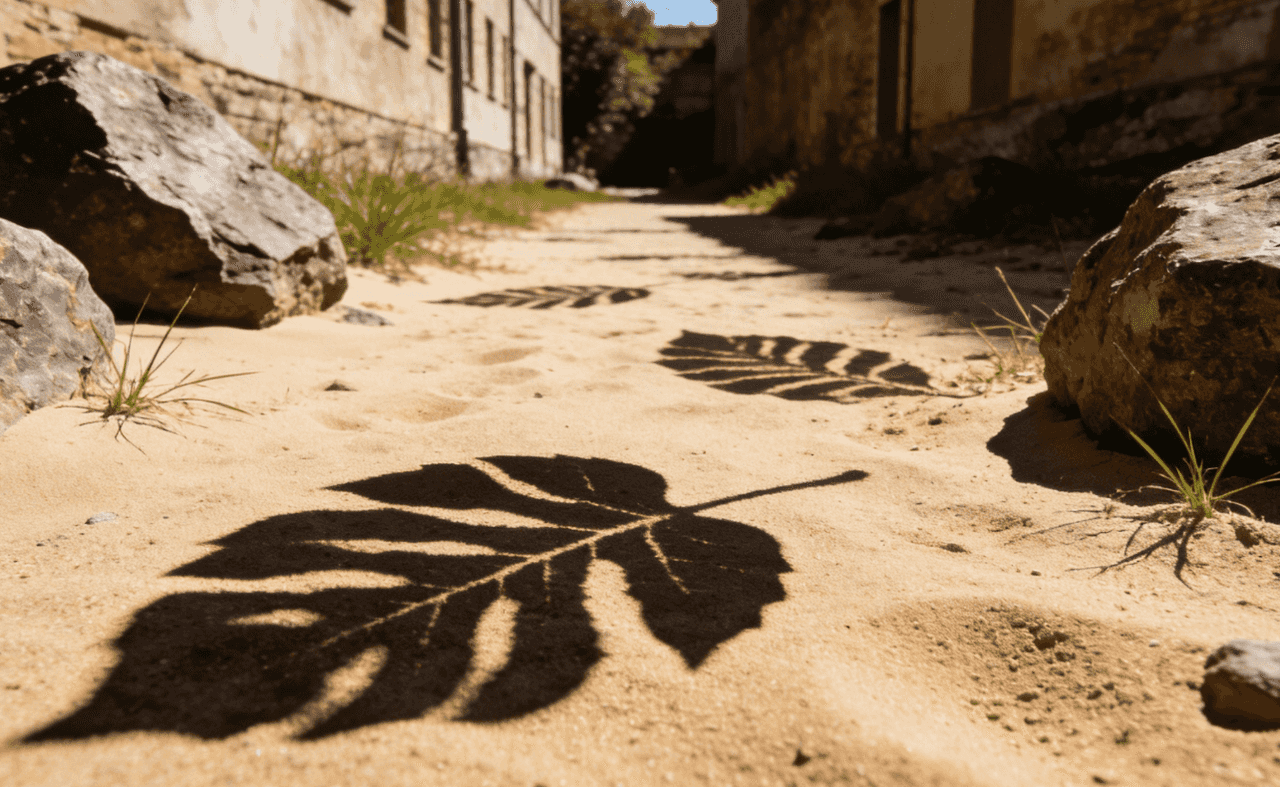
Look for interesting patterns, textures, and contrasts
Outdoor environments are full of natural details that can improve a photograph. Patterns in leaves, sand, or buildings create visual interest and balance. Attributes such as rough rocks or soft grass add character to the image. Strong contrasts between light and dark areas can also make the photo more striking.
Enhance visual impact by focusing on details:
Shoot textures with side lighting (early morning or late afternoon)
Use low ISO (100) to preserve fine details
Increase contrast by slightly underexposing (-0.3 to -1 EV)
Try polarizing filters to reduce glare and boost colors
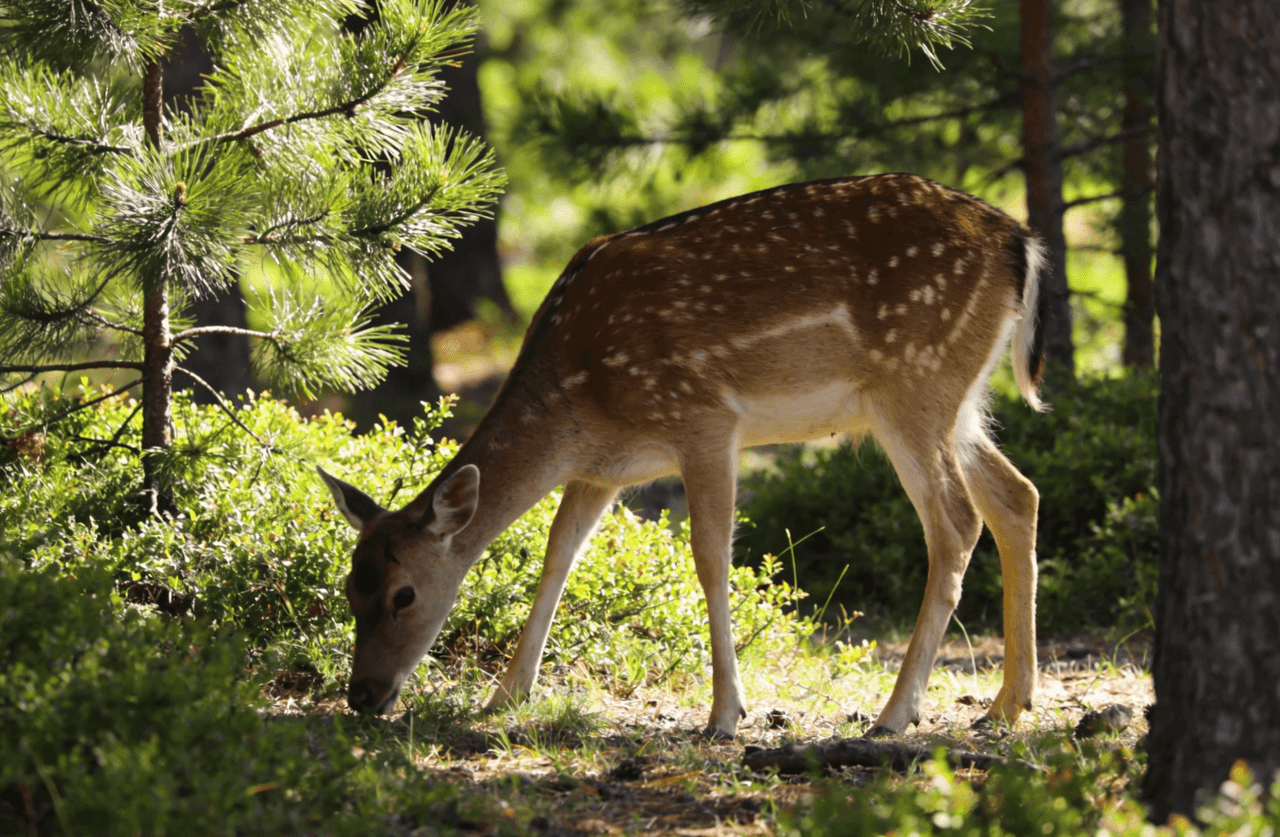
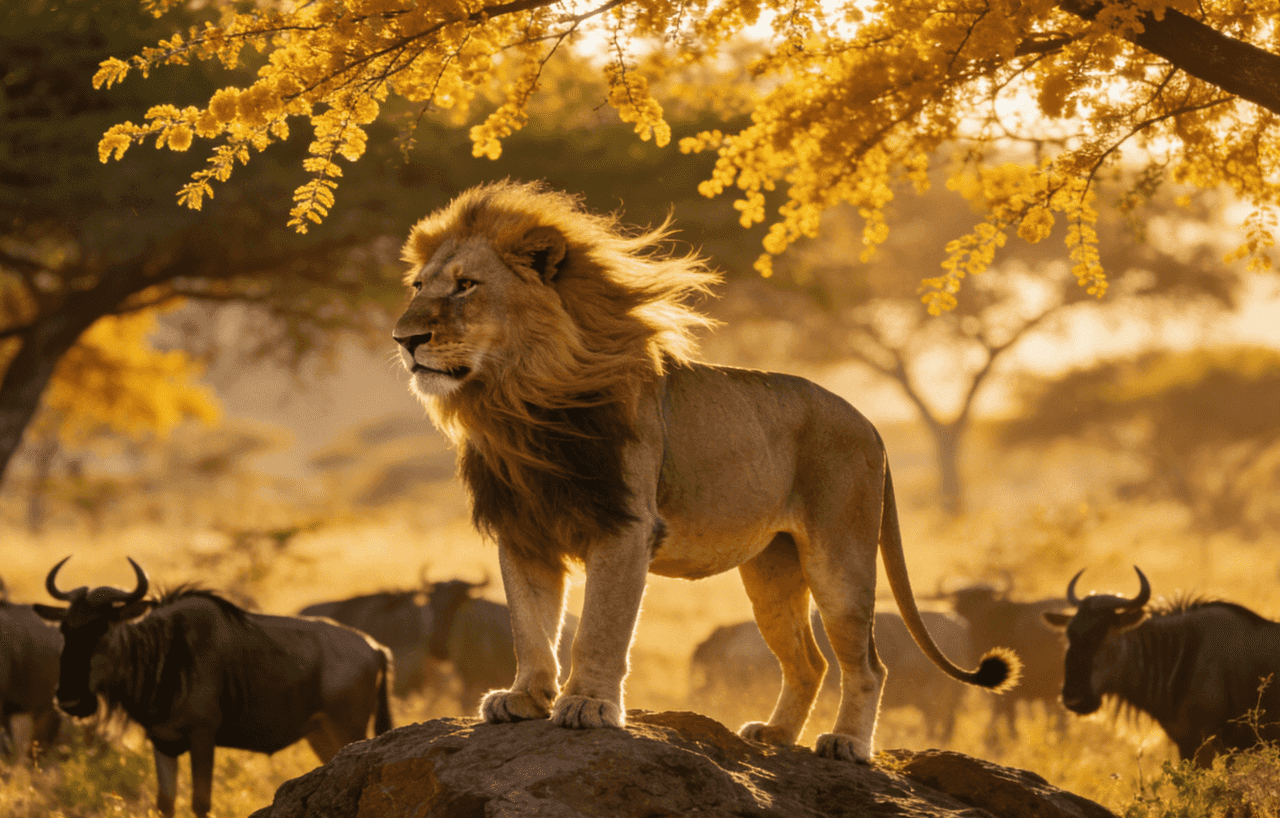
Be patient and observe wildlife behavior
Wildlife outdoor photography ideas require calm observation and patience. Animals often move quickly, so waiting quietly helps you capture natural actions. By watching their behavior, you can predict the right moment to take the shot. This approach increases the chance of getting clear and meaningful images.
Wildlife photography requires both timing and the right setup:
Use a telephoto lens (200mm–600mm) for safe distance shooting
Set shutter speed ≥ 1/1000s to freeze motion
Enable continuous autofocus (AF-C / AI Servo)
Use burst mode to capture multiple frames
Try different angles and perspectives
Changing your position can completely transform a photo. Instead of shooting from eye level, try taking pictures from a lower or higher angle. This can highlight shapes, details, and surroundings in a new way. Exploring different perspectives often leads to more creative and unique outdoor photographs.
Creative angles can transform ordinary scenes:
Shoot from low angles to make subjects appear larger
Use overhead shots for patterns and symmetry
Try leading lines (roads, rivers) to guide the viewer
Experiment with tilting the frame for dynamic compositions
Planning and preparation for outdoor photography trips
Planning and preparation are key to successful outdoor photography trips. Researching locations, checking weather conditions, and knowing the best times for lighting ensures you capture the scene at its finest. Here are the essential steps for planning and preparing for outdoor photography trips.
Research your shooting location: Before heading out, study your location to understand the best viewpoints, access points, and potential obstacles. Knowing the terrain, key landmarks, and popular angles helps you plan shots effectively and avoid wasting time on-site.
Check weather and lighting conditions: Review the forecast and natural lighting for your shooting day. Weather affects not only the scene but also your equipment safety, while lighting conditions determine the mood, shadows, and highlights in your images. Planning around these factors ensures optimal results.
Pack essential gear and accessories: Bring all necessary outdoor photography equipment to avoid interruptions during your shoot. This includes memory cards, extra batteries, lens cloths, and tripods. Having the right outdoor photography gear ensures you can handle different conditions and capture every moment effectively.
Portable power solutions for outdoor photographers
Outdoor photography often takes place far from reliable power sources, making consistent power essential for long shoots. Cameras, drones, lighting, and accessories all require dependable charging to keep your workflow uninterrupted. With solutions from EcoFlow, photographers can power their gear anywhere. Portable power stations provide a stable, portable energy supply, ensuring every shot is captured without worrying about battery limits.
Compact portable power station for weekend photography outings
The EcoFlow DELTA 3 Plus is a compact yet powerful portable power station designed for outdoor photographers who often work in locations without electricity. With a 1024Wh battery capacity, it provides enough stored energy to charge essential photography devices such as cameras, drones, smartphones, LED lights, and small accessories. This makes it a practical companion for weekend photography trips, travel shoots, and nature expeditions.
One of its key advantages is its strong power output, delivering 1800W of continuous AC power with up to 3600W surge capacity. This allows photographers to charge multiple devices at once without worrying about performance issues. Whether you are charging camera batteries, powering a drone controller, or running small lighting equipment, the stable inverter ensures reliable operation throughout the shoot.
The DELTA 3 Plus is also built for convenience with fast charging technology, reaching around 80% charge in about 45 minutes from a wall outlet. It also supports solar charging and car charging, giving photographers flexible ways to maintain power during outdoor travel. This feature is especially useful when moving between locations or working in remote areas.
To make power management easier, the station includes multiple output ports such as AC outlets, USB-A, USB-C, and DC connections, enabling several devices to charge simultaneously. Through the EcoFlow mobile app, users can monitor battery levels, track energy usage, and adjust power settings remotely.
Best for:
Weekend outdoor photography trips, charging cameras and drones, travel photography setups, lightweight outdoor shoots, and photographers who need a compact off-grid power solution.
High-capacity power station for extended outdoor shoots
For photographers working on longer projects or multi-day outdoor shoots, the EcoFlow DELTA 3 Max Plus provides a larger and more powerful energy solution. With a 2048Wh battery capacity, it provides enough power to run demanding equipment such as laptops, professional lights, drones, camera batteries, and other electronic devices used during outdoor productions.
The unit features a 3000W-rated AC output with up to 6000W surge power, enabling it to handle multiple devices at the same time. This makes it ideal for photographers and content creators who need reliable electricity for editing equipment, lighting setups, and charging stations while working in remote environments.
Another major advantage is its flexible charging capability. The system can recharge through AC wall outlets, car charging, generators, or solar panels, giving photographers multiple options to maintain power during extended trips. With high-input solar charging support, users can generate energy during the day and use it later for night shoots or device charging.
To simplify power control, the DELTA 3 Max Plus provides multiple connection ports, including AC outlets, USB-A, USB-C, and DC outputs, enabling several devices to run simultaneously. Photographers can also monitor battery levels, track energy consumption, and control power settings through the EcoFlow mobile app, making energy management easy during outdoor projects.
Best for:
Extended outdoor photography shoots, remote landscape expeditions, powering lights and laptops, drone operations, multi-day field projects, and photographers who require a high-capacity portable power solution.
Outdoor portraits: capturing people in natural settings
Outdoor portraits enable photographers to capture people naturally within their environment. Using natural light, surroundings, and context helps create authentic, engaging, and visually appealing images.
Position your subject relative to the light
Where you place your subject in relation to the light affects the mood of the portrait. Front, side, or backlighting can create different effects, from soft highlights to dramatic shadows. Experimenting with light placement helps bring out the subject's features naturally.
Use reflectors or natural reflectors like water/sand
Reflectors bounce light back onto the subject, reducing harsh shadows and brightening the face. If you don't have a reflector, surfaces like water, sand, or light-colored walls can serve the same purpose. This technique ensures even, flattering light without overexposing the background.
Direct and pose your subject for natural expression
Guiding your subject with gentle directions helps capture relaxed and authentic expressions. Encourage small movements or interactions with their surroundings to make the pose look natural. Avoid stiff or forced positions to keep the portrait lively and engaging.
Balance background and subject separation
Keeping your subject distinct from the background makes the portrait clearer and more professional. Use depth of field to blur the background or choose settings that contrast with the subject's clothing. This approach ensures the viewer's attention stays on the person.

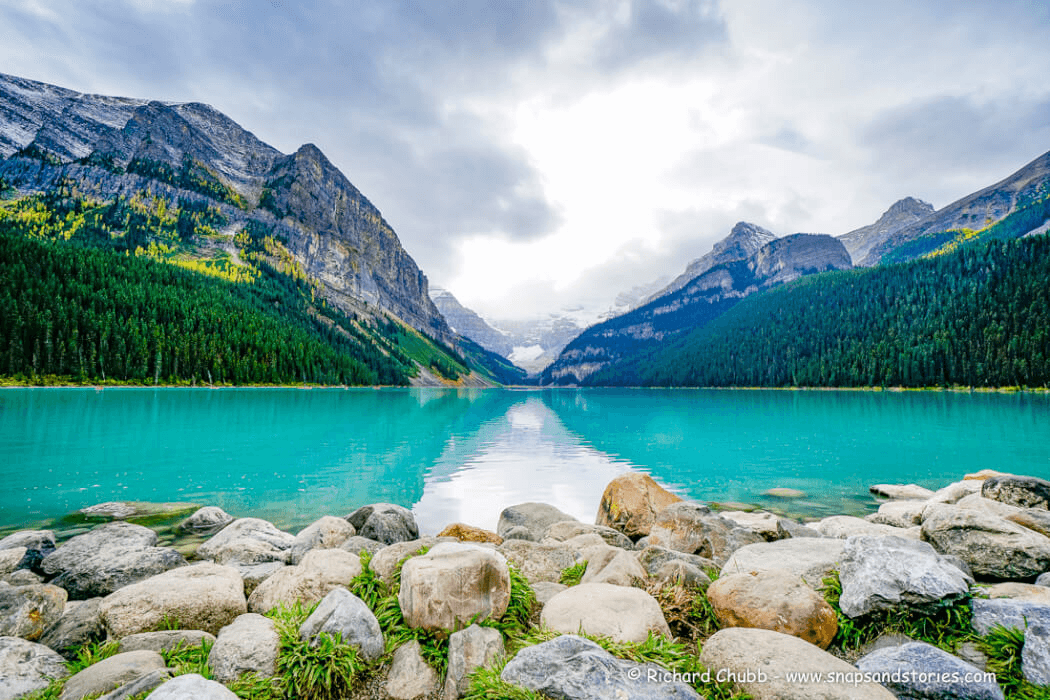
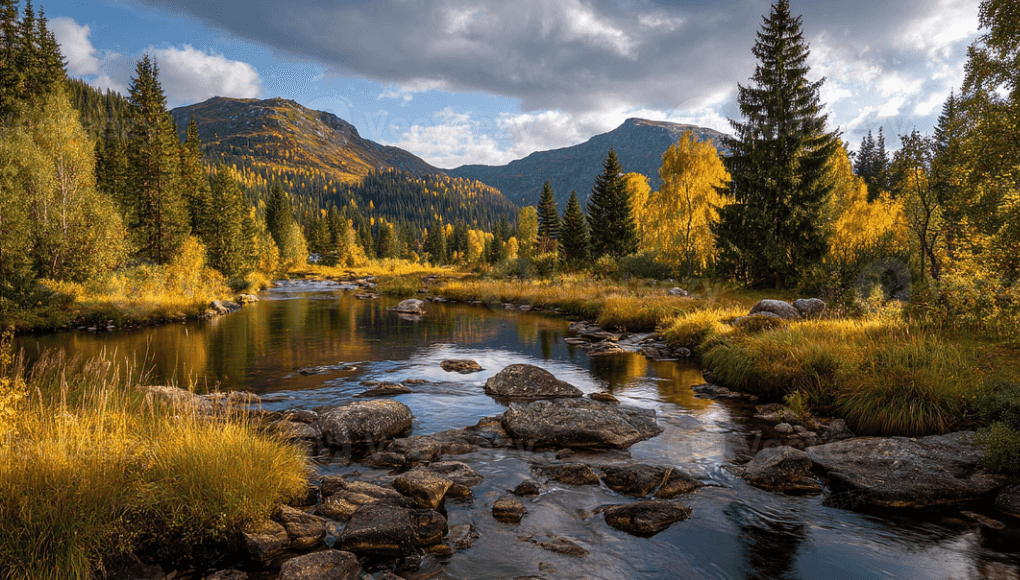
Landscape and nature photography: capturing scenic beauty
Landscape and nature outdoor gear photography focuses on capturing the beauty of the natural world. By observing light, textures, and compositions, photographers can create stunning images that showcase the environment's depth and atmosphere.
Framing natural landscapes for depth and scale
Use foreground, middle ground, and background elements to give your landscapes a sense of depth. Including objects like rocks, trees, or pathways helps the viewer understand the scale of the scene. This approach makes wide-open landscapes feel more three-dimensional and immersive.
Using leading lines, textures, and patterns in nature
Natural lines, textures, and repeating patterns guide the viewer's eye through your photo. Rivers, trails, or rows of trees can act as visual pathways, while textures like bark, leaves, or rocks add interest. Combining these elements enhances the composition and creates a more engaging image.
Capturing dynamic skies and changing weather
The sky can dramatically change the mood of your photos. Cloud formations, sunrise or sunset colors, and stormy weather add atmosphere and emotion. Observing and timing your shots to include these changes makes landscapes more striking and visually memorable.
Long exposure techniques for water, clouds, or motion
Using long exposure smooths moving elements like waterfalls, rivers, or clouds, giving a dreamy, silky effect. A tripod and slow shutter speed are key to keeping other parts sharp. This technique adds a sense of motion while keeping the rest of the scene crisp and detailed.
Wildlife inclusion in landscapes without disturbing nature
Incorporating animals can bring life and scale to landscapes. Approach wildlife cautiously or use a zoom lens to avoid disturbing them. Capturing animals in their natural environment adds authenticity and storytelling to your scenic photographs.
How to protect your gear outdoors
Protecting your outdoor gear photography is essential to ensure it lasts and performs well. Exposure to dust, moisture, and rough terrain can damage cameras and lenses. Here's how to keep your equipment safe while shooting outdoors.
Weather protection (rain covers, waterproof bags)
Always be ready for sudden rain or moisture by using rain covers or waterproof bags. These protect your camera and lenses from water damage. Even light showers can harm electronics, so having proper protection ensures your gear stays dry and safe.
Dust and sand protection
Outdoor shoots, especially in deserts or on beaches, can expose your equipment to dust and sand. Keep lenses capped when not in use and consider using protective filters. Regularly wiping your gear with a soft cloth prevents particles from scratching or clogging sensitive parts.
Safe transport and storage tips
When moving between locations, use padded camera bags or cases to prevent bumps and drops. Organize your gear so items don't rub against each other during travel. Proper storage and careful handling reduce the risk of damage and make outdoor photography settings more worry-free.
Conclusion
To summarize, mastering outdoor photography helps you capture stunning landscapes, portraits, and wildlife with clarity and creativity. Understanding camera settings, light, and composition ensures every shot stands out. Proper planning, essential gear, and protective equipment keep your photography smooth and stress-free. Portable power solutions like EcoFlow DELTA series enable you to charge cameras, drones, and other devices even in remote locations. By combining smart preparation, the right tools, and creativity, outdoor photography becomes an enjoyable and rewarding experience. Overall, these tips and gear choices help you take striking, memorable shots anywhere you go.
FAQs
What are the 7 basics of photography?
The seven basics of photography include aperture, shutter speed, ISO, composition, lighting, focus, and white balance. Mastering these elements helps you control exposure, depth, and clarity in your images. Each factor works together to create balanced and visually appealing photos. Understanding them is essential for both beginners and experienced photographers.
What is the best ISO for outdoor photography?
For the best outdoor photography, a low ISO setting, usually between 100 and 400, is ideal to reduce noise and capture clear images. Bright daylight allows you to keep ISO low, while early morning or evening lights may require slightly higher ISO values. Adjusting ISO according to lighting conditions ensures sharp and well-exposed photos every time.
Which mode is best for outdoor photography?
Manual mode is often the best choice for outdoor photography because it gives full control over aperture, shutter speed, and ISO. It enables you to adapt to changing light and capture exactly the look you want. For beginners, aperture priority mode can also be helpful to manage depth of field while letting the camera handle exposure.