DIY RV Power Inverter Installation Guide for Canadian Campers [2026]
Whether you’re parked by a quiet Ontario lake or watching the northern lights in Yukon, having reliable 120V power in your RV makes a big difference. A power inverter converts your RV batteries’ DC power into standard household AC power, so you can safely run everyday appliances while off-grid.
In this guide, we’ll cover how to choose the right inverter, install it step by step, and follow Canadian electrical safety standards to ensure your system runs reliably in all seasons.
How Do I Prepare and Choose the Right Inverter?
Before you touch a single wire, slow down and make a plan. A solid DIY RV power inverter installation starts with knowing how much power you actually use. If your inverter is undersized, it will constantly trip. Oversize it without upgrading cables, and you create safety risks, especially during cold Canadian nights when power matters most. The same calculation also helps you plan what size power station you might need for backup or portable use.
Start by estimating your daily consumption:
| Appliance | Power (W) | Daily Use (hours) | Energy Consumption (Wh/day) |
|---|---|---|---|
| Microwave | 1000 | 0.167 | 167 |
| Coffee Maker | 900 | 0.083 | 75 |
| Laptop | 60 | 4 | 240 |
| Total | — | — | 482 Wh/day |
Note: These are short-use examples. Running appliances longer will increase your daily energy demand.
Choose a Pure Sine Wave Inverter
Always go with a Pure Sine Wave inverter. It delivers smooth, stable AC power similar to what you get at home. That protects sensitive electronics like laptops, CPAP machines, and modern appliances. Modified wave units may cost less upfront, but they can cause buzzing, overheating, or long-term damage.
Alternative Option for Simplicity
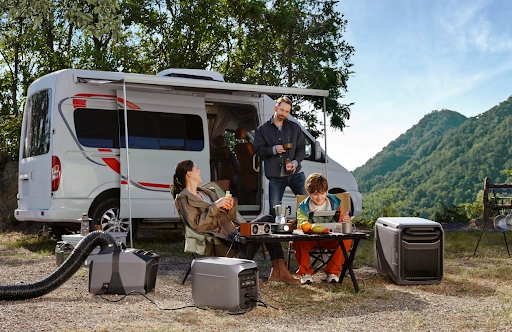
If you prefer a plug-and-play solution instead of full wiring, the EcoFlow DELTA 3 Max Plus Portable Power Station (2048Wh) offers near-instant under 10ms UPS switching. That means if shore power drops, your appliances stay running without interruption. Its X-Boost mode can handle short surges up to 3800W, though continuous loads should remain within its 3000W rating. It’s designed for RV and off-grid setups, not as a home UPS replacement.
Select Appropriate Cable Specifications
Cable size matters more than most beginners expect. Inverters pull high current at low voltage, and undersized wiring can overheat quickly. For most 2000W to 3000W systems, 0 or 2/0 AWG copper cables are standard. Always account for cable length and potential voltage drop when planning.
Install Fuses or Circuit Breakers
Never skip overcurrent protection. Install a properly rated fuse or breaker on the positive cable between the battery and inverter. Think of it as your system’s safety barrier, if something shorts, it prevents heat buildup and protects your RV from serious damage.

Step-by-Step RV Power Inverter Installation Guide
Installing a power inverter, especially for those planning to outfit a DIY campervan, requires careful attention to safety and proper wiring standards. Once your equipment is ready, take your time and follow a clear sequence. Rushing electrical work in an RV, especially before a big trip, is how small mistakes turn into expensive ones.
Ensure Safety Before Starting
Disconnect every power source. Unplug shore power, isolate your solar input, and remove the negative terminal from your battery bank. Use a multimeter to confirm there’s no remaining voltage before touching any cables.
Mount the Inverter Properly
Install the inverter as close to the batteries as possible to reduce voltage drop. Choose a dry, ventilated space away from anything flammable, and leave several inches around cooling vents to prevent overheating.
Canadian winter tip: Placement matters even more in cold provinces. While inverters can operate in low temperatures, charging LiFePO4 batteries below 0°C can cause permanent damage. Whenever possible, mount your inverter and battery bank inside the insulated part of your RV rather than in an exterior compartment.
If you’re looking for a compact power solution that doesn't sacrifice performance, the EcoFlow DELTA 2 Portable Power Station is the ideal step up. While still incredibly portable at only 27 lbs (12kg), it offers a massive jump in capability with its 1800W AC output. It’s small enough to fit under a van bench or in a car trunk, yet powerful enough to run not just your laptop and phone, but also a portable fridge or coffee maker.
Complete DC Wiring and Grounding
Connect your heavy gauge cables carefully, matching polarity exactly, red to positive, black to negative. Then attach a proper chassis ground from the inverter’s grounding point to the RV frame. Correct grounding reduces shock risk and improves system stability.
Set Up AC Output
Decide how you want to distribute 120V power. You can plug appliances directly into the inverter’s outlets, or install a transfer switch to connect it to your RV’s existing breaker panel. The second option creates a cleaner, more integrated setup.
Test the Installation
Reconnect your batteries and power on the inverter. Start small. Plug in a low draw device like a lamp to confirm output. If everything runs smoothly, you can gradually test larger appliances.
Configure for LiFePO4 Batteries
By 2026, a lot of Canadian RV owners have switched over to LiFePO4 lithium battery banks. They’re lighter, last longer, and handle deep cycles better than old-school lead-acid. The key difference is how they discharge, lithium holds a steady voltage almost to the end, then drops off quickly.
The Adjustment: Go into your inverter’s settings using the built-in screen or Bluetooth app and find the Low Voltage Cut-off LVD option.
The Setting: Instead of the typical 10.5V setting used for lead-acid batteries, raise it to around 11.5V to 12.0V.
Why it matters: A slightly higher cutoff gives your system a smoother shutdown instead of a sudden power drop. That helps prevent the battery’s internal protection system from hard-tripping, protects your electronics, and extends the life of your lithium bank, especially during longer off-grid trips in colder Canadian conditions.


What Safety Measures Should I Follow When Installing an RV Power Inverter in Canada?
Working with electricity in an RV isn’t the same as wiring a shed in your backyard. You’re dealing with movement, vibration, moisture, and big temperature swings, especially if you’re travelling across provinces. That means safety needs to be taken seriously from the start.
Ensure Proper Heat Ventilation
Inverters naturally generate heat while operating. Leave several inches of space around cooling fans and ventilation openings so air can circulate properly. If airflow is blocked, the unit can overheat and shut down automatically. That’s not something you want happening while you’re making dinner at a campsite or running a heater on a chilly evening.
Check Polarity Before Connecting External Power
Always double check your wiring before reconnecting power. Accidentally reversing positive and negative cables, even briefly, can damage the inverter’s internal components and void the warranty. Take an extra minute to confirm connections, it’s worth it.
Follow CSA C22.1 Electrical Standards
In Canada, electrical installations should follow the CSA C22.1 Canadian Electrical Code. Proper grounding, correct wire sizing, and overcurrent protection aren’t just best practices, they help protect your RV, your equipment, and your insurance coverage. Staying compliant also gives you peace of mind when you’re travelling coast to coast.
Conclusion
Installing an RV power inverter is one of the most practical upgrades you can make if you want reliable off-grid power in Canada. When you choose a quality pure sine wave inverter and follow proper wiring and safety steps, your system can handle years of road trips, from summer in the Rockies to shoulder-season camping out east.
If full DIY wiring feels overwhelming, a portable power station offers a simpler path. They’re compact, self contained, and require far less installation work. For many Canadian RV owners, especially those who camp seasonally, that balance of convenience and dependable off grid power makes a lot of sense.
FAQ
1. How much does it cost to install an inverter in a campervan?
In Canada, most installs fall between $500 and $2,500 CAD. The final cost depends on inverter size, cable quality, added components like transfer switches or breakers, and whether you handle the install yourself or hire an RV technician.
2. What size inverter do I need to run a camper?
For most Canadian RV setups, a 2000W to 3000W inverter is the sweet spot. That range comfortably handles common appliances like a microwave, coffee maker, or hair dryer. When deciding on the inverter size for an RV, always calculate your total load, especially if you plan to run multiple items at once.
3. What can a 3000 watt inverter run in an RV?
A 3000W inverter can power most standard household appliances, including a microwave, toaster, coffee maker, and several electronics at the same time. Many 13,500 BTU RV air conditioners can run on a 3000W inverter, but startup surge matters. Always check your AC’s starting wattage before connecting.
4. Do you need a fuse between an inverter and a battery?
Yes. A properly rated fuse or breaker between the battery and inverter is essential. It protects your wiring and RV from potential short circuits or high current faults.
5. Does an inverter drain RV batteries quickly?
It can. High wattage appliances pull significant power, and a standard lead-acid battery bank may drain within a few hours under heavy use. That’s why many Canadian campers upgrade to higher capacity LFP lithium batteries for longer off-grid stays.