How to Use a Battery Car Charger: A Simple and Reliable Guide
Car batteries are the lifeline of your vehicle, powering everything from the ignition system to the headlights and onboard electronics. But like any other component, they don’t last forever. Whether you accidentally left your headlights on overnight or your battery is simply old, a dead battery can bring your day to a screeching halt. That’s where a battery car charger comes in handy.
In this guide, we dive into how to use a battery car charger effectively and safely. We’ll start by exploring the essential tools needed, followed by a detailed, step-by-step process to charge your car battery properly. Dive in to find out how to use a battery charger on your car!
Tools Needed to Use a Battery Car Charger
To successfully charge your car, a battery charger alone isn’t always enough. You’ll need a few additional tools and safety gear to ensure the process goes smoothly and safely. Here’s what you should have on hand:
Reliable Power Source
A power source is absolutely essential for operating your battery car charger. Without it, the charger cannot function. Depending on the situation, you can use:
Standard Electrical Outlet (AC Power): 110-120V or 220-240V outlet for home use.
Portable Power Stations: Useful in remote areas or emergencies where wall outlets aren’t available. EcoFlow RIVER 3 Plus Portable Power Station is a great option, which can be used with the EcoFlow 500W Alternator Charger to provide efficient power for various SUVs, Pickups and RVs.
.PNG)
Solar-Powered Chargers: Great for off-grid situations, though typically provide slow charging.
Vehicle-to-Vehicle Charging: Some jump starter units can act as chargers using their internal battery or another vehicle’s battery.
Always verify the power requirements of your charger and ensure the power source is compatible.
Safety Gear
Charging a battery involves working with electrical currents and sometimes corrosive battery acids. Safety equipment is non-negotiable. Always have:
Safety goggles to protect your eyes from acid splashes.
Rubber gloves to protect your hands from chemicals and electric shocks.
Protective clothing to shield your skin.
Battery Terminal Cleaner or Wire Brush
Before connecting the charger, you need to ensure the battery terminals are clean and free of corrosion. A wire brush or specialized battery terminal cleaner will help remove any buildup, ensuring a good electrical connection.
Multimeter (Optional but Useful)
A multimeter allows you to check the current voltage of your battery before and after charging, helping determine the battery’s health and how much charging it requires.
Please note, to make the charging process effortless and secure, choose a smart charger that includes advanced safety features and automatic shut‑off to prevent overcharging.
For example, the EcoFlow 500W Alternator Charger streams real‑time charging data to the EcoFlow app, so you can monitor voltage and current remotely. Its intelligent charging algorithm adapts to your car battery’s needs, reducing the risk of damage and ensuring a hassle‑free, reliable charging experience.
But for those who need even greater versatility and power, the EcoFlow 800W Alternator Charger steps up as a true 3‑in‑1 solution, functioning as a rapid alternator charger, a jump‑starting pack and a battery maintainer—all in one compact 2.3 kg unit. It can replenish up to 1 kWh (85Ah@12V) in just 1.3 hours via reverse charging, and its dedicated jump‑start mode ensures you can get moving again in an emergency. Built to withstand temperatures from –20 °C to 60 °C and humidity up to 95%, it thrives in extreme conditions that adventure travelers or off‑road enthusiasts often encounter. Like its 500 W counterpart, it integrates seamlessly with the EcoFlow app for real‑time monitoring and control, while its multi‑layer safety protections guard against overcurrent, overvoltage, and short circuits—offering a reliable, all‑round charging experience for tech‑savvy drivers.
How to Use a Battery Car Charger
Now that we’ve introduced the essential tools, let’s move on to the step-by-step process of how to car battery charger. Follow these instructions on how to use a battery charger for car carefully to avoid accidents and ensure a fully charged battery.
Step 1: Prepare Your Work Area
The first step of how to charge a car battery with a battery charger is to prepare your work area.
Park your vehicle on a flat, well-ventilated surface away from flammable materials. Turn off the ignition and remove the keys. Ensure the area is well-lit, and keep children and pets away from the workspace.
Step 2: Inspect the Battery
Open the hood and visually inspect the battery. Check for any visible cracks, leaks, or damages. If the battery case is swollen or leaking, do not attempt to charge it—replace it immediately. Also, confirm whether the battery is a maintenance-free type or if it requires checking fluid levels.
Step 3: Clean the Battery Terminals
Using your battery terminal cleaner or wire brush, remove any corrosion from the battery terminals. A clean connection ensures efficient charging and reduces the risk of sparks. If you notice white or bluish powdery deposits, that’s corrosion that must be removed before proceeding.
Step 4: Disconnect the Battery (If Required)
Some manufacturers recommend disconnecting the battery from the vehicle before charging, especially if using an older charger, to prevent potential electrical damage to the vehicle’s electronics. Consult your vehicle’s manual for specific recommendations.
Disconnect the negative terminal first (usually marked with a minus sign or black cable).
Then disconnect the positive terminal (marked with a plus sign or red cable).
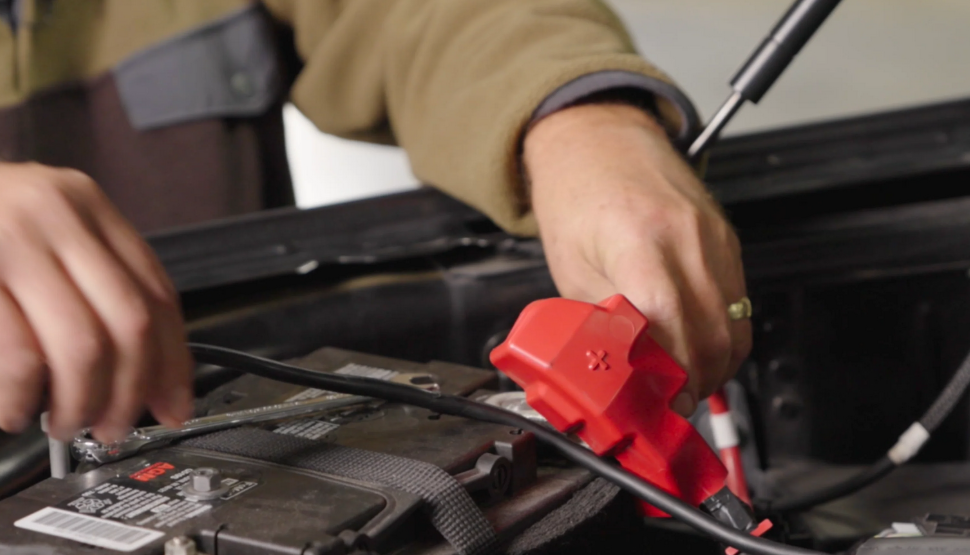
Step 5: Connect the Charger Cables
Attach the positive (red) charger clamp to the positive battery terminal.
Attach the negative (black) charger clamp to the negative battery terminal or a grounded metal part of the vehicle’s frame, away from the battery.
Ensure the clamps are firmly connected and not touching each other.
Step 6: Set the Charger Parameters
If you’re using a manual or adjustable charger, select the appropriate charging voltage and amperage. Lower amperage (2-10 amps) is ideal for slow, trickle charging, which is safer and better for battery health. Higher amperage (20-50 amps) charges faster but should be used cautiously. Modern smart dual battery system typically handle these adjustments automatically, ensuring optimal charging without manual intervention.
Step 7: Start the Charging Process
Plug in the charger to your reliable power source and turn it on. Most chargers have indicator lights or digital displays to show the charging status. Monitor the battery voltage periodically using a multimeter, if available.
Keep in mind that charging time can vary significantly based on the charger type, the battery's condition, and the selected charging rate. Slow (trickle) charging may take 12 to 24 hours, while faster options can restore a battery in 1 to 4 hours.
Step 8: Turn Off and Disconnect the Charger
Once the battery reaches full charge, power down the charger before disconnecting any cables. This important safety step prevents dangerous electrical arcs that could cause sparks or damage.
When removing the clamps, always follow the correct order:
First, remove the negative (black) clamp.
Then, remove the positive (red) clamp.
If you previously disconnected the battery terminals from the vehicle, reconnect them now from the positive terminal, followed by the negative terminal. Ensure the connections are tight and secure.
Step 9: Test the Battery
The last step of how to use a car battery charger is to test the battery.
Start your car to check if the battery has been charged properly. If the engine starts smoothly and electrical components work as expected, the battery is in good condition. If issues persist, the battery may be failing and require replacement.
Conclusion
Learning how to use a battery car charger is a valuable skill that can save you time, money, and frustration. With the right tools and safety precautions, you can revive a dead battery and get back on the road in no time. Additionally, understanding how to properly maintain and charge your car battery helps extend its lifespan and ensures reliable vehicle performance. So, the next time you’re faced with a dead battery, you’ll know exactly what to do!
FAQs
How to properly use a car battery charger?
To properly use a car battery charger, start by ensuring the battery terminals are clean and free of corrosion. Connect the positive (red) clamp to the positive terminal first, followed by the negative (black) clamp to the negative terminal or a grounded metal part. Select the correct charging parameters, plug in the charger, and monitor the charging process.
How long do you leave a car battery charger on?
The charging duration depends on the charger’s amperage and the battery’s condition. Trickle chargers (2-10 amps) may take 12 to 24 hours for a full charge, while higher amperage chargers (20-50 amps) can complete the process within 1 to 4 hours.
Which color goes first on a car battery charger?
When connecting a car battery charger, always attach the positive (red) clamp first to the battery’s positive terminal. Afterward, connect the negative (black) clamp to the negative terminal or a metal grounding point on the vehicle’s frame. This sequence minimizes the risk of accidental sparks and electrical short circuits. When disconnecting, reverse the order by removing the negative clamp first, then the positive clamp.
How do you connect a car charger to a battery?
Begin by turning off the vehicle and ensuring the charger is unplugged. Clean the battery terminals if necessary. Attach the positive (red) clamp to the positive terminal on the battery, then connect the negative (black) clamp to the negative terminal or a suitable metal ground away from the battery. Once securely connected, plug in the charger and start the charging process.