Solar Geyser Installation: Cost, Setup & Payback Guide
If you’re looking to cut back on energy costs and make your home more efficient, solar geyser installation is one of the smartest investments you can make. South Africa’s abundant sunshine makes it ideal for tapping into solar energy for hot water needs. Whether you’re upgrading your system or installing a solar geyser for the first time, understanding the process, costs, and long-term value is key to making an informed decision.
Why Go Solar for Hot Water in South Africa?
Switching to solar for water heating is more than just a trend—it’s a step towards a more cost-effective and sustainable home. A solar geyser uses evacuated tube collectors to absorb the sun’s rays and convert that energy into heat. This heat is then used to warm water for everyday use.
In a country where sunshine is abundant year-round, solar geysers are effective even in colder climates. Not only do they significantly reduce electricity consumption, but they also offer long-term savings and reduced reliance on grid electricity. Over time, you’ll save thousands of rands, all while lowering your carbon footprint.
Step-by-Step Solar Geyser Installation Process
There are two main types of systems—low-pressure and high-pressure. Each type requires different steps and tools. Here’s how to install solar geyser systems based on the setup you choose.
Low-Pressure Solar Geyser Installation
Low-pressure solar geyser is a roof-mounted, gravity-fed tank that heats water under gentle pressure—ideal where municipal water pressure is weak or absent. When installing it, you can follow these simple methods to ensure safe and efficient performance.
1. Safety and Preparation
Start by ensuring the vent pipe is upright and never blocked. Always fill glass tubes with water before exposing them to sunlight to prevent damage. Use only soapy water—not oil or grease—when inserting tubes to protect the silicon seals.
2. Selecting and Preparing the Site
The geyser should face true north for maximum sunlight. Install it as high as possible to promote natural water flow. For 26° pitched roofs, avoid the rear leg and anchor the stand securely to avoid movement.
3. Stand and Tank Assembly
Assemble the stand and ensure it’s stable and level. Attach the tank, aligning the inlet and outlet correctly. Handle the tank with care to avoid damaging its thin stainless steel shell.
4. Vent Pipe Installation
Install the vent pipe using a silicon washer. Keep the pipe upright and avoid adding heavy extensions. Length depends on your setup—up to 2 meters for JoJo tanks and 1.5 meters for Latco valves.
5. Glass Tube Insertion
Fill tubes with water during the day, lubricate with dish soap, and insert gently with a twisting motion. Ensure proper seating and avoid harsh angles to prevent breakage.
6. Magnesium Anode (If Included)
The anode prevents corrosion. Insert it through a marked glass tube and inspect it yearly to extend the tank’s lifespan.
7. Water Supply Options
Float Valve (Auto-fill): Simple and reliable, but may introduce cold water during use.
Manual Valve: Prevents cold water intrusion but requires daily filling.
Electronic Filling: Use with a timer for automated filling and control.
JoJo Tank: Provides backup supply when pressure is low; ensure the vent pipe isn’t too long.
8. Connecting Hot and Cold Lines
Balance pressure using a 100kPa Latco valve. Use the topmost outlet for hot water and ensure the cold inlet is pressure-regulated to avoid imbalance in the mixer.
9. Electric Element (Optional)
Install a standard 38mm boss element, sealing with thread tape. Pair with a thermostat or controller to manage heating when solar energy is low.
10. Final Checks
Confirm that all connections are tight, the vent pipe is open, and tubes are filled. Test electronic components if present.
High-Pressure Solar Geyser Installation
A high-pressure solar geyser is a sealed, stainless-steel tank that can withstand higher water pressures. When installing one, you can follow these methods for the best results.
1. Site Orientation
Face the tubes true north. Set the tilt to your latitude plus 10° (e.g., Pretoria: 35°). Factory stands typically offer a 38° tilt, which works well on flat roofs.
2. Unboxing and Stand Assembly
Unpack components carefully. Use J-profile bars and cross-struts to build the stand. Use plastic washers to avoid wear and anchor the stand securely to the roof.
3. Glass Tubes and Heat Pipes
Extend the copper heat pipe, apply grease, and insert it into the tank sleeve gently. Secure the mirror side into the black cup and clip it to the stand.
4. Mounting the Tank
Place the tank on its cradles. Use plumber’s tape—not washers—on threaded joints. Inspect the internal magnesium anode annually.
5. Plumbing Connections
Choose between:
Non-Return Valve Method: Prevents backflow and keeps the element submerged.
Anti-Siphon Loop Method: Reduces valve noise and complies with local standards.
In series installations, place the backup electric element in the last tank only.
6. Electric Backup Element
Install it if needed for cloudy days. Use a standard screw-in element and control it via a thermostat or digital controller. Waterproof the connections to comply with local codes.
7. System Commissioning
Fill the tank, inspect for leaks, and check that all tubes and pipes are secure. Test the thermostat and electrical systems if installed.
8. Maintenance
Inspect tubes, check anodes, and look for any signs of copper sleeve leaks. Regular upkeep ensures long-term efficiency and warranty protection.
How Much Does It Cost to Install Solar Geysers?
The total cost of solar geyser installation in South Africa depends on the system type and installation complexity. Here’s a rough breakdown:
System Prices:
Low-pressure Direct Thermosiphon: R6,000 – R12,000
High-pressure Direct Thermosiphon: R12,000 – R25,000
Indirect Thermosiphon: R16,000 – R25,000
Installation Fees:
Basic Low-pressure: R2,000 – R3,000
Standard High-pressure: R2,000 – R4,000
Complex Installations: R3,000 – R5,000
These figures exclude plumbing materials and mounting hardware. It’s always best to get a detailed quote based on your roof type, plumbing layout, and household needs.
In some areas, Eskom solar registration may be required, especially if your system includes electric elements or ties into the grid. While the registration itself is usually free, ensuring your system is compliant may involve extra installation steps or certified inspections, which could slightly increase your total costs. Be sure to factor this in when budgeting for your project.
Overall, prices can vary depending on the installer, location, and whether extra plumbing or mounting materials are needed. It’s always smart to compare a few quotes from qualified professionals. Although the upfront cost may seem high, the long-term electricity savings often offset the expense, allowing many homeowners to recover their investment within just a few years.
How Long Until a Solar Geyser Pays for Itself?
Let’s say you invest around R27,000 in a 200-litre solar geyser installation. This switch can reduce your electricity bill by 30–40% each month. In just 28 months, your system can pay for itself, and from there on, the savings go straight into your pocket. Installing a solar geyser not only makes financial sense but also moves you closer to energy independence.
To build on those savings, consider integrating backup power like the EcoFlow DELTA Pro Portable Power Station. With a 3600W–7200W output and expandable capacity up to 25kWh, it can power nearly all your household appliances during outages. This solar generator is perfect for supporting your geyser and other essentials when the grid is down.
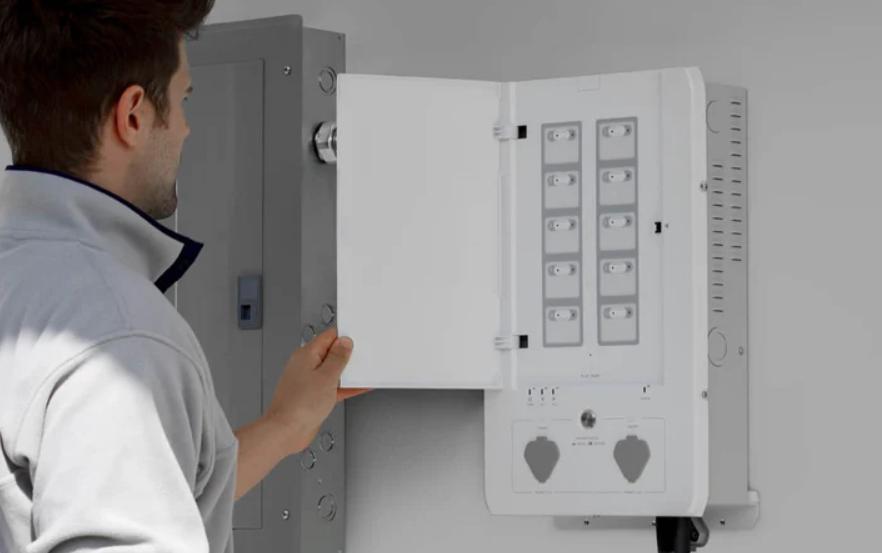
For a full smart home energy setup, pair the DELTA Pro with the EcoFlow Smart Home Panel. This panel connects up to 10 home circuits, allowing automated backup, peak-rate control, and real-time energy management through the EcoFlow app. Together with your solar geyser, this forms a flexible, efficient solution that works with your grid tied solar system.
Conclusion
Solar geyser installation is a cost-effective step toward lowering your energy bills while enjoying dependable hot water at home. With quick payback and lasting benefits, it’s a smart investment. If you’d like to explore more solar solutions, EcoFlow offers a wide range of options worth checking out.
FAQs
Can you convert a normal geyser to a solar geyser?
Yes, you can convert a normal electric geyser to work with solar power by installing a retrofit solar conversion system. This usually involves adding a solar collector panel, connecting it to your existing geyser, and possibly including a circulation pump and controller to manage the water temperature. It’s a good option if your current geyser is still in good condition and you want to reduce electricity usage without buying a whole new system.
However, not all geysers are suitable for conversion, and the efficiency may not match that of a full solar geyser system. Be sure to consult a professional to check compatibility and ensure the system meets safety and performance standards.
What are the disadvantages of a solar geyser?
While solar geysers offer many benefits, there are a few disadvantages to consider. First, the initial cost of purchase and installation can be high, even though you’ll save in the long run. Second, performance depends on sunlight, so during rainy or cloudy weather, the water might not get hot enough. To solve this, many people install an electric backup element, which uses electricity when needed.
Another issue is that solar geysers may require more roof space and careful orientation toward the sun for best performance. Also, installation must be done properly to avoid leaks or pressure issues. Regular maintenance, such as checking the anode and inspecting the tubes, is needed to keep the system running efficiently.
Can you connect a solar geyser to an existing geyser?
Yes, you can connect a solar geyser to an existing geyser in a hybrid setup. This means the solar geyser preheats the water before it enters your regular electric geyser. The benefit is that your electric geyser doesn’t have to heat cold water from scratch, which saves electricity.
This type of system is often called a split or indirect system and can be installed with the help of a plumber or solar technician. The setup requires valves, pipes, and possibly a pump, depending on your home’s water pressure. It’s a practical solution for people who want to keep their current geyser but still enjoy the benefits of solar water heating.