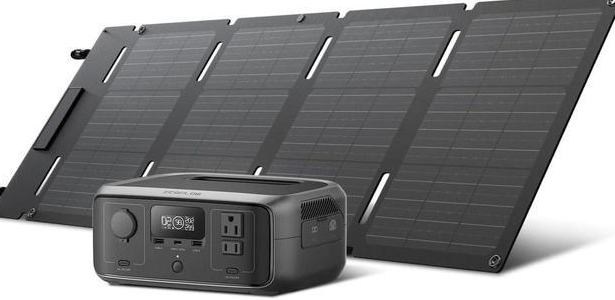
How to Use A Solar Battery Charger for Your Boat
A solar battery charger for your boat provides a quiet and clean way to keep your batteries topped off without having to run your engine or a generator. It works by converting sunlight into DC electricity to maintain your batteries and power your onboard electronics. A properly installed system can extend the life of your batteries, give you more freedom from shore power, and lower your environmental impact. This guide will take you through the whole process, from planning and picking parts to installation and upkeep, so you can build a reliable solar setup for your boat.
Phase 1: Plan Your Solar Charging System for Your Boat
Proper planning is the key to a good solar installation. Taking the time to assess your needs first will help you choose the right size system, preventing you from buying one that’s too weak for your needs or wasting money on one that’s too powerful.
Step 1: Calculate Your Daily Power Usage
First, figure out how much power you actually use. This is sometimes called an "energy audit."
Make a list of every DC-powered device you plan to use (e.g., navigation gear, lights, refrigeration, water pumps, stereos). For each device, find its amp draw (usually on the product label or in the manual) and estimate how many hours you use it on a typical day.
To calculate your daily need in Amp-hours (Ah), multiply the device's amp draw by the hours of use. For example, a refrigerator that draws 3 amps and runs for a total of 8 hours a day uses 24 Ah (3A x 8h = 24 Ah). Add up the Ah for all your devices to get your total daily power requirement. It’s smart to add a 20-25% buffer to your final number to cover for energy losses in wiring and charging.
Step 2: Check Your Battery Bank
The main job of a solar battery charger for a boat is to use solar panels to recharge your deep-cycle house batteries. Solar charging is designed for deep-cycle "house" batteries, which are built to be drained and recharged many times. It is not for "starting" batteries, which are used to crank the engine.
Your battery's chemistry—whether it's Flooded Lead-Acid, AGM, Gel, or Lithium—determines how it needs to be charged. Your solar charge controller must be set for your specific battery type to charge it safely and effectively. Using the wrong setting can ruin your batteries.
Finally, know your bank's total capacity in Amp-hours. For instance, two 100 Ah batteries wired together give you a 200 Ah bank. A good rule of thumb is to have enough solar panel wattage to produce 10-25% of your battery bank's total capacity.
Step 3: Find the Best Mounting Spot for Sun
Where you place your portable solar panels has a major impact on their performance. Look for sturdy locations that get the most direct, unobstructed sunlight all day, such as a hardtop, deck, or a custom arch.
Be very aware of sources of shade. The boom, mast, radar, or even sails can cast shadows that will dramatically reduce a panel's output. Watch how shadows fall across your boat at different times of the day to find the sunniest spot.
Phase 2: Select the Right Solar Components for Your Boat
With your plan ready, it's time to select the hardware. For safety and long-term reliability in a saltwater environment, it is essential to use quality, marine-grade components.
Solar Panels
Use the daily power usage you calculated in Phase 1 to determine the total wattage you need. As a general guide, a 100-watt panel can produce roughly 30-35 Amp-hours (Ah) on a sunny day.
- Panel Type: Monocrystalline panels are the most efficient and are best if your mounting space is limited. Polycrystalline panels are a bit less efficient but also less expensive. For mounting on curved surfaces like a bimini, semi-flexible panels are a good choice, though they are often less durable than rigid panels.
- Marine-Grade Build: This is a requirement for any boat. Ensure the panels have strong, corrosion-resistant aluminum frames and saltwater-proof junction boxes.
Solar Charge Controller
This is the most important component, and it is never optional. The charge controller sits between the panels and the batteries. Its job is to regulate the power flow, protecting your batteries from overcharging. It also prevents power from draining back out of the batteries into the panels at night.
Controller Types: PWM vs. MPPT
PWM (Pulse Width Modulation) controllers are an older, cheaper technology best suited for small systems (under 200 watts). MPPT (Maximum Power Point Tracking) controllers are newer and much more efficient (up to 30% better), especially in low light or with larger systems. For most boaters, an MPPT controller is highly recommended and worth the extra cost.
How to Size the Controller
Controllers are rated in amps. The rating must be higher than your solar panel's maximum short-circuit current (Isc), listed on its spec sheet. A safe way to size it is to divide your total solar wattage by your battery voltage, then add a 25% safety margin.
Example: For a 200W panel setup on a 12V system: (200W / 12V) = 16.7A. Add a 25% margin (4.2A), and you need a controller rated for at least 21A. A 30A controller would be a safe choice.
Wiring, Connectors, and Fuses
Don’t cut corners on your electrical connections, as corrosion is a constant threat in a saltwater environment.
- Marine-Grade Tinned Wire: Only use tinned copper wire. The tin coating on each strand of wire protects it from corrosion much better than standard automotive wire.
- Proper Wire Gauge (AWG): Using wire that is thick enough is critical to prevent energy loss (known as voltage drop). Use a standard AWG chart to find the right wire gauge based on the amperage and the length of the wire run. Longer runs and higher amps require thicker wire (a lower AWG number).
- Waterproof Connectors: Use waterproof MC4 connectors for all connections between the panels and wiring. For all other connection points (like at the controller or batteries), use heat-shrink ring terminals to create a sealed, moisture-proof connection.
- Fuses/Breakers: This is a mandatory safety step. You must install a fuse or a circuit breaker on the positive wire between the charge controller and the battery. This protects the wiring and your boat from short circuits and fire hazards.
Phase 3: Install Your Solar Battery Charger for Your Boat
With your equipment ready, you can begin the installation. Work methodically and make safety your top priority.
IMPORTANT: Safety First!
Before touching any wiring, turn off all battery selector switches. Then, disconnect the negative (-) terminal of the house battery bank you are working on. This is crucial for preventing accidental short circuits.
Step 1: Securely Mount the Solar Panel
Attach the panel in its chosen location. Use robust mounting hardware that is strong enough to withstand heavy winds, pounding waves, and the constant motion of the boat.
Step 2: Mount the Charge Controller
Install the controller in a dry, protected location with good ventilation to allow heat to dissipate. To minimize energy loss (voltage drop), position it as close to the battery bank as is practical. A common spot is on a bulkhead or inside a cabin locker.
Step 3: Run the Wires
Carefully route the wires from the solar panel to the charge controller. Protect the wires from any sharp edges or areas where they could rub by using chafe guards or routing them through a conduit.
Step 4: Connect the Components in the Correct Order
This step is critical. You must connect the components in the right sequence to avoid damaging the charge controller.
- Connect the Charge Controller to the Battery FIRST. This is the most important part of the connection process. It allows the controller to read the battery’s voltage (e.g., 12V or 24V) and configure itself correctly. Install the fuse holder on the positive wire during this step, but leave the fuse out for now.
- Connect the Solar Panel to the Charge Controller SECOND. While you make these connections, keep the solar panel completely covered with an opaque material like its cardboard box or a thick towel. This prevents the panel from generating power, which could damage the controller if it were connected live.
Step 5: Finalize and Test the System
Once all connections are secure, insert the fuse into its holder on the wire between the controller and the battery. Remove the cover from the solar panel. The charge controller’s display or indicator lights should immediately light up, showing that the system is active and the panel is sending a charge to the batteries.
Phase 4: Onboard Operation and Maintenance
A solar system on a boat is designed to be resilient, but the harsh marine environment—with its salt, humidity, and constant movement—means a few specific checks are needed to ensure it performs reliably for years.
Keep an Eye on Your Electrical "Fuel Gauge"
When you're on the boat, especially when at anchor and relying on solar, get used to checking your charge controller display. Think of it as your electrical fuel gauge. It shows you the real-time power (in amps) your panels are generating and your battery's state of charge. This crucial information lets you know if you have enough power to run the refrigerator all night or if you need to start conserving energy.
Maintenance of the Marine Environment
The saltwater environment requires two key maintenance tasks:
- Keep Panels Free of Salt and Grime: A dried layer of salt spray is one of the biggest blockers of sunlight for a boat's solar panels. Bird droppings are another common problem. Make it part of your regular boat wash-down routine to rinse the panels thoroughly with fresh water.
- Inspect for Corrosion and Chafe: About once a month, quickly inspect all your wiring and terminals, especially at the batteries. Look for any fuzzy green or white buildup, which is a clear sign of corrosion that can interrupt power flow. Because a boat is always moving, also check that wires aren't rubbing (chafing) against any bulkheads or sharp edges, which can wear away their protective coating over time.
Onboard Troubleshooting Steps
If your system isn't charging on a sunny day, the problem is usually simple and boat-related. Before assuming a component has failed, check these things:
- Check for Shadows: Are the panels shaded by the boom, the mast, a radar unit, or a partially unfurled sail? Remember, even a small but consistent shadow on one part of a panel can drastically reduce its total output.
- Check for Grime: Are the panels clean? A quick rinse to remove a new layer of salt or dirt might be all that's needed.
- Check Connections and Fuses: Has a fuse blown or a breaker tripped? Are the battery terminals and all other connections tight and clean? A loose connection can happen with the boat's vibrations.
If these steps don't solve the issue, the charge controller's manual and any error codes it displays are your next resource.
Outfit Your Boat for Energy Freedom!
A properly planned and installed solar battery charger for a boat is more than just a convenience; it's a sound investment in your boating experience. This reliable, silent, and low-maintenance asset enhances your time on the water by extending the functional life of your batteries and freeing you from a total reliance on shore power or your engine. By following these steps with care, you can secure greater energy independence and enjoy the peace and quiet that drew you to the water in the first place.
For press requests or interview opportunities, reach out to our media team
media.na@ecoflow.com